
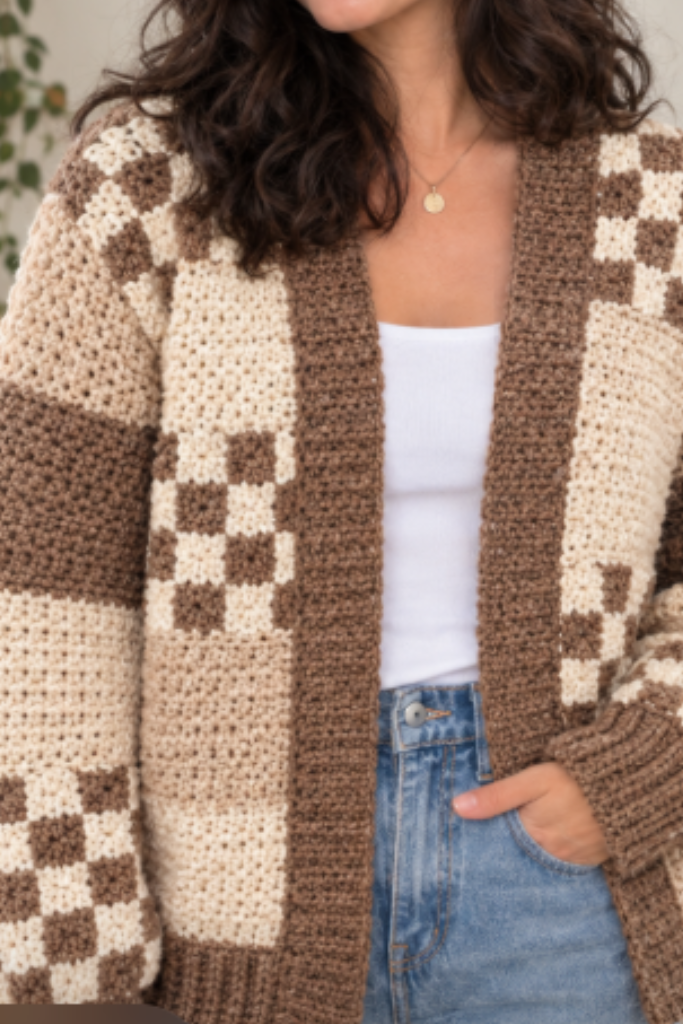
Looking for a cozy crochet cardigan that feels timeless, comfortable, and easy to style? This Beige Patchwork Cardigan is a beautiful handmade piece that combines soft neutral shades with a classic patchwork design.
Have you ever wanted to crochet a cardigan that you can wear with almost anything? The warm combination of soft white, beige, and latte-inspired tones makes this cardigan perfect for layering over jeans, dresses, or your favorite casual outfit.
With its cozy texture and relaxed look, this cardigan is a lovely project for anyone who enjoys creating wearable crochet pieces. Whether you’re making one for yourself or as a thoughtful handmade gift, this Beige Patchwork Cardigan is sure to become a favorite in your wardrobe.
Materials
- Red Heart Super Saver Jumbo yarn in Soft White
- Red Heart Super Saver Jumbo yarn in Buff
- Red Heart Super Saver Jumbo yarn in Cafe Latte
- 5 mm crochet hook
- 4 mm crochet hook
- Yarn needle
- Scissors
- Measuring tape
- Optional: four to five 15 mm buttons
You may also like these projects:
- 10 Summer Crochet Projects
- 15 Easy Crochet Pouch Patterns
- 10 Easy Crochet Summer Hat Tutorial Ideas
- 10 Crochet Keychain Ideas
Abbreviations
- ch – chain
- hdc – half double crochet
- BLO – back loop only
- st(s) – stitch(es)
Part 1: Patchwork Squares
You’ll make a set of solid-colored squares and a set of checkered squares. All squares are worked in half double crochet.
Solid Squares (make as many as needed in Buff and in Cafe Latte)
- Make a slipknot and chain 28.
- Work hdc into the 2nd chain from the hook, then hdc across the remaining chains. Tip: crochet over your starting yarn tail as you work this first row so you have one less end to weave in later.
- Ch 2, turn.
- Work 1 hdc into each stitch across.
- Repeat Row 4 until you have 20 rows total (including your first row). This gives you a roughly square patch.
- Make solid squares in both Buff and Cafe Latte until you have the number needed for your size.
Checkered Squares
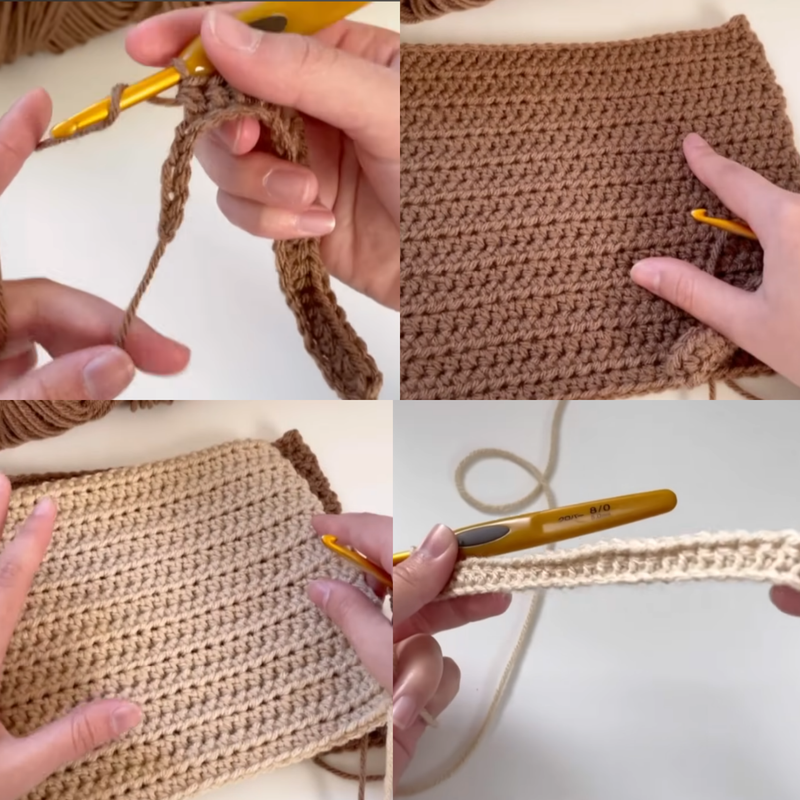
- Chain 29. Work hdc into the 2nd chain from hook and hdc across (this is your foundation row).
- Join the white yarn with a slipknot. You can chain 1 for extra security, then turn your work.
- Work 4 hdc, carrying/enclosing both yarn tails inside the stitches as you go.
- Switch your working yarn to the tan color (Buff or Cafe Latte) and work 4 hdc, keeping the white yarn carried inside the stitches.
- Continue alternating colors every 4 stitches across the row, switching your working yarn each time you change color blocks.
- Repeat this alternating-color row for a total of 3 rows per checker section.
- After 3 rows, rotate the colors — where you previously worked white, you’ll now work tan and vice versa — directly above the previous checker blocks. Chain 2 and turn between color changes as needed.
- Continue repeating this pattern (3 rows per checker, then rotate colors) to build up the checkerboard look.
- For the final (20th) row, work in a single solid color — matching whichever color you started your foundation chain with — so the square has a solid strip at both the top and bottom.
- This gives you 20 rows total per checkered square. Make as many as needed for your size (the pattern used around 32 total patches across all squares for the body).
Part 2: Ribbing Pieces
Sleeve Cuffs (make 2)
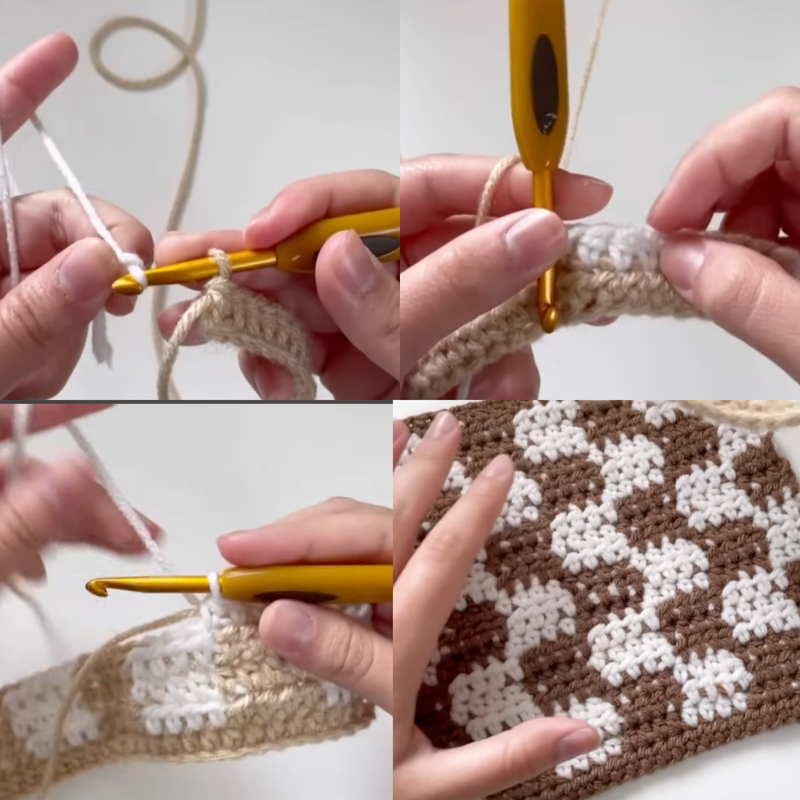
Use the 4 mm hook and tan-colored yarn (Buff or Cafe Latte).
- Chain 15.
- Work hdc into the 3rd chain from the hook, then hdc across the remaining chains.
- Ch 2, turn.
- Work hdc into the back loop only of each stitch across — this creates the ribbed texture.
- Repeat Rows 3–4 (ch 2, turn, BLO hdc across) for a total of 20 rows.
- Repeat the entire cuff to make a second matching cuff.
Note: this same back-loop ribbing technique is also used for the neckline ribbing, though the neckline version will later include buttonholes.
Neckline Pieces (2 shaped panels)
First neckline piece:
- Work your ribbing/panel as above, and after approximately 13 rows, begin shaping: ch 2, turn, then skip the first stitch and work into the next stitch instead of the usual first stitch. This starts a gradual slope on one side only, while the opposite edge stays straight.
- Continue working across, chaining 2 and turning at the end of each row, and keep decreasing by skipping a stitch on the same side each row.
- Repeat this decrease pattern until you reach a total of 20 rows. You should end up with a piece that has one straight edge and one sloped/slanted edge.
Second neckline piece:
- Chain 26. Work hdc into the 2nd chain from hook and hdc across.
- Ch 2, turn, and work into the 2nd stitch from the hook (similar shaping start to the first neckline piece), maintaining one straight edge while decreasing on the other side.
- Continue this decrease pattern for a total of 12 rows.
- After the 12 rows of decreasing, work an additional 8 rows of plain hdc (no more decreasing).
- This piece will have 12 rows of sloped decrease plus 8 rows of straight hdc.
Bottom Ribbing
Use the 4 mm hook.
- Chain 12.
- Work hdc into the 3rd chain from the hook, then hdc across the remaining chains.
- Ch 2, turn, then work hdc into the back loop only of each stitch (same technique as the cuffs).
- Repeat this back-loop hdc row for a total of 108 rows, or the number of rows needed for your size.
- Fasten off, leaving a long yarn tail for sewing this ribbing onto the bottom of the cardigan.
Neckline/Collar Ribbing
Use the 5 mm hook.
- Chain 10.
- Work hdc into the 3rd chain from the hook, then hdc across.
- Ch 2, turn, and work back-loop-only hdc across, just as with the other ribbing pieces.
- Repeat this row for a total of 140 rows, or the number of rows needed for your size.
- Fasten off, leaving a long yarn tail for sewing.
Part 3: Assembly
Part One – Sewing the Patches
- Lay out your solid and checkered squares to plan your front and back body panels and sleeves. Each panel uses two “layers” (rows) of patches — one row uses squares with a particular corner orientation, and the row above uses squares with the opposite/chopped corner orientation, alternating as you build up the panel.
- Using a yarn needle, sew the squares together by matching up two stitches at a time between adjoining patches — sew through corresponding stitch pairs across the seam.
- You can sew seams either vertically or horizontally; horizontal seams tend to be easier since the stitch definition is clearer to follow.
- Repeat this process to assemble the front body panel, the back body panel, and both sleeve panels from your patches.
Part Two – Seaming the Body and Adding Ribbing
- Sew together the top shoulder seams of the front and back panels.
- Sew together the side seams of the front and back panels, leaving an armhole opening on each side for attaching the sleeves.
- Sew the sleeve panels into the armhole openings.
- Sew the bottom ribbing (108-row piece) along the entire bottom edge of the cardigan, using the long tail left for this purpose.
- Sew the neckline ribbing (140-row piece) around the neckline opening, along with the two shaped neckline panels, following your written pattern’s diagram for how the corner pieces line up (a photo reference is recommended if working from a written pattern, since the shaping pieces have specific orientations).
- Sew the cuffs onto the ends of the sleeves.
- If desired, add 4–5 buttons to the neckline ribbing/button band.

One Comment
Comments are closed.