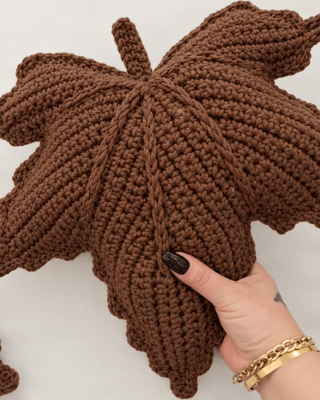
Bring a little touch of autumn coziness into your home with this beautiful Decorative Autumn Leaf Pillow! If you love warm colors, handmade decorations, and cozy seasonal touches, this crochet project is a lovely way to make your space feel extra inviting.
Have you ever wanted to create a fall decoration that is both practical and beautiful? This leaf-shaped pillow is a fun project that combines soft crochet texture with the natural beauty of autumn leaves. It looks adorable on a sofa, armchair, bed, or cozy reading corner, and you can easily customize it with your favorite fall-inspired colors.
Materials
- Thick/chunky yarn (the sample used an unlabeled cinnamon-colored chunky yarn, and a second version in Ören Bayan Atlas yarn) — about 1 ball (100 g) is enough for one leaf panel; you need enough for two panels
- Crochet hook: 3.5 mm or 5 mm, depending on your yarn thickness and tension
- Fiberfill stuffing (or finely cut scrap yarn as a substitute)
- Yarn needle, scissors
Important note on yarn and hook: This piece needs thick yarn. Cotton or thin yarn will produce a very small cushion. The thicker your yarn, the larger the finished leaf. If you crochet tightly, go up a hook size for a more comfortable fabric.
Abbreviations
- ch – chain
- sc – single crochet
- sl st – slip stitch
- st(s) – stitch(es)
About This Pattern
The leaf is built using short rows — you work back and forth, stopping a few stitches short of the end of each row and turning without chaining. This gradual stopping-short is what creates the curved lobes (“slices”) of the leaf. A chain-4 or chain-2 space is made at the outer edge of each turn, which forms the serrated edge of the leaf.
You will make two identical leaf panels, then join them and stuff them.
Part 1: Foundation
- Make a slipknot and chain 16.
- Turn the chain so you can see the horizontal bar/ridge along the back of the chain.
- Working into those horizontal back-bar stitches, work 1 sc into each — you should have 15 sc at the end of the row. Turn.
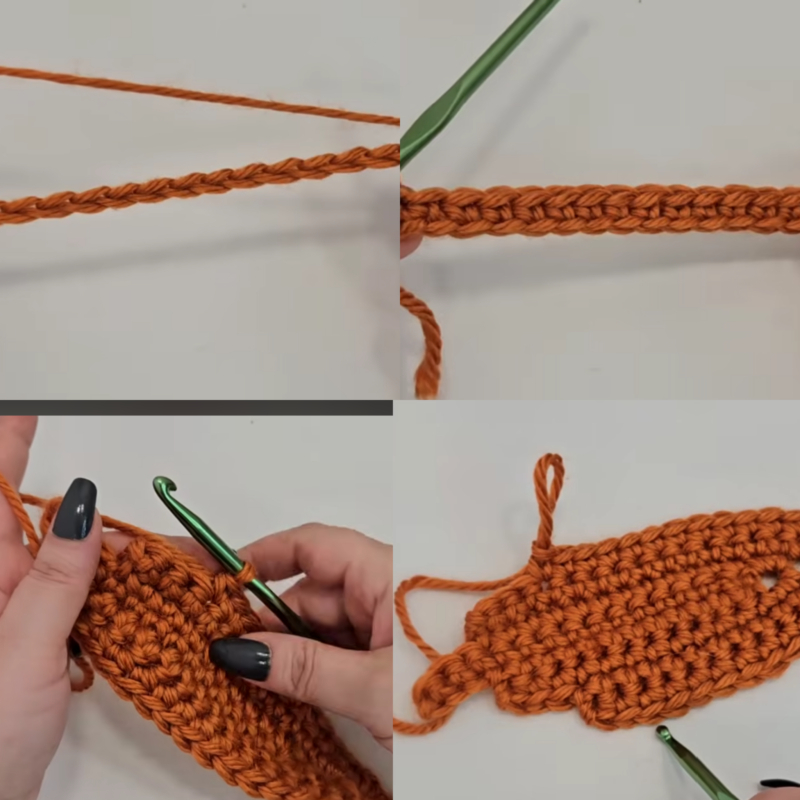
Part 2: Building the Leaf Lobes (Short Rows)
This section is repeated to build up each lobe of the leaf.
- Ch 4, then turn immediately.
- Work 1 sc into the top of the first sc, and continue working 1 sc into each stitch across, carrying your working yarn along the back — stop when there are 3 sc remaining in the row. Do not work those last 3 stitches.
- Turn without chaining. Insert your hook into the stitch directly in front of you and work sc back across the row until you reach the chain-4 space.
- At the chain-4 space, work 2 sc into the ch-4 space. Then ch 4 again, and work 2 sc into the chain-4 space on the return.
- Continue working 1 sc into the top of each sc until there are again 3 sc remaining, then turn immediately without chaining.
- Repeat steps 3–5, always: leaving 3 stitches unworked at one end, turning with no chain, and working 2 sc + ch 4 + 2 sc at the outer edge.
Counting the lobes (“slices”): As you repeat, small pointed sections form along the outer edge. Work this repeat until you have 4 slices (not counting the very first one at the base). That completes your first leaf lobe. You will build a total of 5 leaf lobes overall.
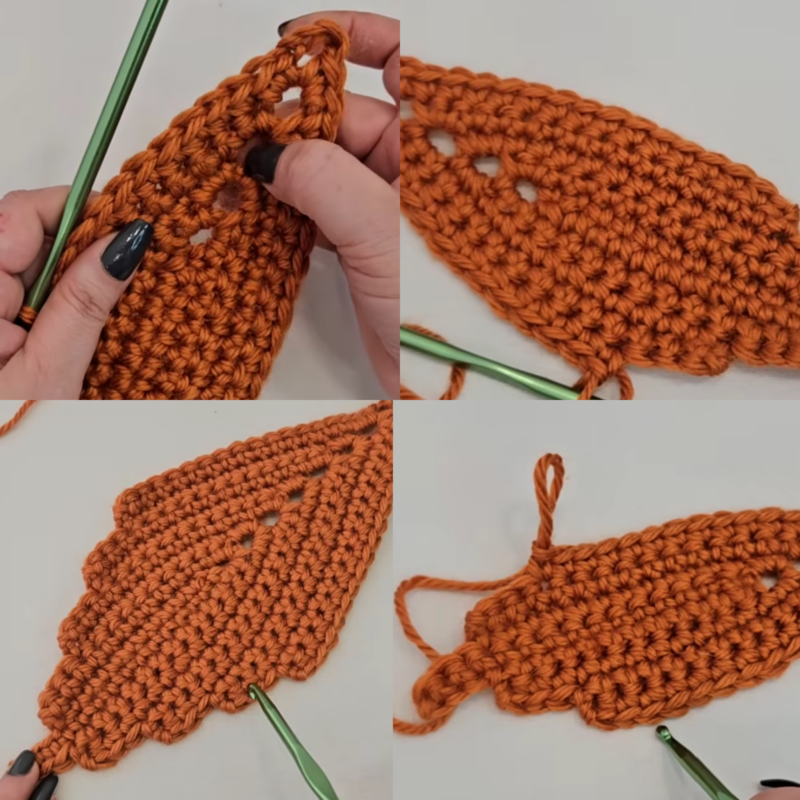
Part 3: Second Leaf Lobe
- Work into the last sc, then work 2 sc, ch 4, 2 sc into the chain space.
- Work sc across until there are 3 sc remaining, then drop those 3 stitches and turn.
- Ch 4, turn, and work 3 sc into the chain-4 space.
- Work across, then at the next edge work 4 sc into the chain space.
- Ch 2 (instead of ch 4 now), skip 1 sc, and work 1 sc into the 2nd stitch. Turn.
- Work 2 sc into the chain-2 space, then 1 sc into each sc across to the end of the row. Turn.
- Continue this pattern, alternating your chain-4 edges (on the increasing side) with chain-2 edges, working 3 sc into the ch-4 space on the turns.
- When you reach the widest point of the lobe, begin decreasing: continue the same back-and-forth short rows, but now work until there are 3 sc remaining each time and turn, gradually narrowing toward the tip.
- Keep working until the lobe closes down: at the end you should see 2 stitches at the bottom edge and 3 stitches at the top edge of the lobe (this uneven count is normal and expected).
- Finish the lobe with ch 2, skip 1, and sc into the next stitch.
Part 4: Third Leaf Lobe (and Beyond)
- Turn and work your sc into the chain space.
- This time work across until there are 5 stitches remaining, then turn.
- Ch 5, then work 4 sc into the chains.
- On the return, work 4 sc again (8 sc total across that chain section).
- Ch 2, skip 1 sc, work 1 sc into the 2nd stitch, turn.
- Work 2 sc into the ch-2 space, then sc across to the end of the row.
- Continue as before: ch 4, turn, 3 sc into the chain space, sc across to the ch-2 section, ch 2, skip 1, sc into the 2nd stitch, turn, 2 sc into the ch-2 space.
- Begin decreasing again: work until 3 sc remain, turn without chaining, sc back to the ch-2 section, ch 2, skip 1, sc into the 2nd stitch.
- Repeat the decreasing rows until the lobe closes, ending at the ch-2 section.
- Work ch 2 and secure to the main leaf body with 2 sc.
Vedio tutorel
Part 5: Remaining Lobes (Mirror Side)
- Work back along the other side of the leaf using the exact same sequence, mirroring what you did on the first side.
- Work sc until 1 sc remains on the lobe, then turn.
- Drop 3 sc, turn, ch 4, work 3 sc into the chain, then 4 sc on the other side, ch 2, sc into the 2nd stitch, turn.
- Continue mirroring all the steps you did on the first half — increasing lobes, then decreasing lobes — until you have completed all 5 leaf lobes on both sides.
- Finish the final lobe with ch 2 and secure with a sc.
Part 6: The Stem
- At the top of the leaf, ch 8.
- Work 7 sc back along the chain, working into each chain up to the last one.
- Slip stitch into the adjacent stitch on the leaf to secure the stem.
- Fasten off and cut the yarn.
Part 7: Closing the Gaps
Because of the short-row construction, there will be small open holes where the lobes meet. Close these before assembly:
- Double your yarn and tie a knot to secure it.
- Working at each chain-2 space, insert your hook or needle underneath, pick up a loop from the bottom, pull through, and move to the next space — drawing the openings closed as you go.
- Keep your tension loose — pulling too tight will pucker the fabric and make the holes harder to close neatly.
- Work your way around, closing each opening.
- Take all the yarn tails to the back, tie them off securely (two knots is fine), and weave them into the inside. Since they’ll be hidden inside the stuffed cushion, the key thing is that they’re secure, not perfectly hidden.
Part 8: Making the Second Panel
Repeat all the steps above to make a second identical leaf panel.
Part 9: Joining and Stuffing
- Place the two leaf panels together with the wrong sides facing each other (right sides facing out).
- Line up the two panels so the stitches match up.
- Join them using slip stitches with your crochet hook (or sew them together with a yarn needle if you prefer). Insert your hook through the matching opposite stitches of both panels and slip stitch them together.
- Work all the way around, but leave an opening along one section large enough to insert your stuffing.
- If the joining gets tight in the narrow sections between the lobes, switch to a smaller hook and keep your tension loose.
- Stuff the leaf with fiberfill, working small amounts at a time into all the narrow points and lobes so every area is evenly filled. Substitute tip: if you don’t have fiberfill, cut leftover or lower-quality yarn into tiny pieces and use that as stuffing.
- Once stuffed, slip stitch the remaining opening closed using the same method.
- Knot securely and hide the yarn end inside the cushion.
Your leaf cushion is complete!
Notes
- Each leaf cushion takes roughly 3 hours to make once you’re familiar with the pattern.
- These make lovely gifts and work well as sofa cushions or car accessories.
- Try it in autumn shades, yellow, or green for variety.
Pattern adapted from a video crochet tutorial by Daisy’s Knitting World.