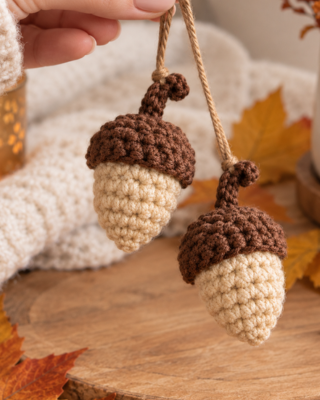
There’s something so sweet and cozy about tiny crochet projects, and this Little Crochet Acorn is the perfect example Whether you love making cute amigurumi, decorating your home for fall, or simply want a quick project to enjoy with your favorite yarn, this little acorn is sure to make you smile.
Have you ever wanted to crochet a small autumn decoration that doesn’t take much time or yarn? This adorable acorn is simple, beginner-friendly, and full of seasonal charm. You can make one as a cute decoration, add it to a fall-themed display, or even create several in different colors for a lovely handmade collection.
Grab your yarn and crochet hook, and let’s make this charming little acorn together!
You may also like these projects:
- 10 Summer Crochet Projects
- 15 Easy Crochet Pouch Patterns
- 10 Easy Crochet Summer Hat Tutorial Ideas
- 10 Crochet Keychain Ideas
Materials
- Small amount of worsted weight yarn (Red Heart Super Saver, size 4) in two colors:
- Tan (e.g., Buff) for the acorn body
- Brown (e.g., Cafe Latte) for the cap and stem
- Yarn needle
- Scissors
- 3.5 mm (size E) crochet hook
Abbreviations
- ch – chain
- sc – single crochet
- dc – double crochet
- sl st – slip stitch
- st(s) – stitch(es)
- MC – magic circle
Part 1: Acorn Body (worked in continuous rounds — do not join each round)
Use the tan yarn. Make a slipknot leaving a 6-inch tail, then form a magic circle.
- Round 1: Work 4 sc into the magic circle. Pull the tail tight to close the circle (4 sts).
- Round 2: Work 2 sc into each stitch around (8 sts).
- Round 3: Sc in the first stitch, then 2 sc in the next stitch — repeat this sequence a total of 4 times around (12 sts). This creates the pointed shape at the base of the acorn.
- Rounds 4–6: Sc into every stitch around, with no increases (12 sts per round). Repeat for all 3 rounds.
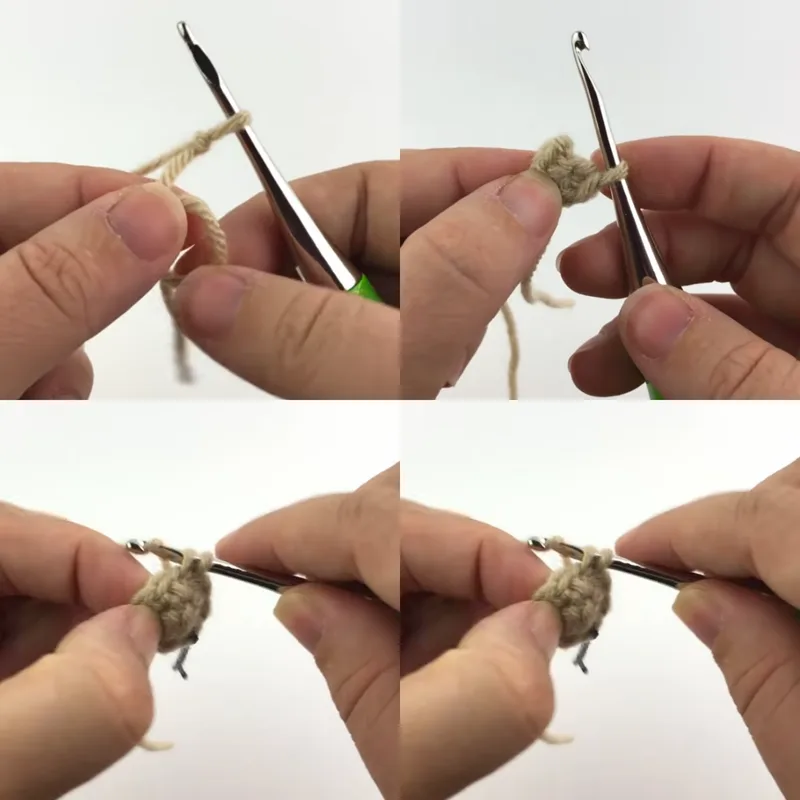
- Fasten off, leaving a yarn end. There may be a slight jog/step where the rounds shift — this will be hidden under the cap later.
- Stuff the yarn tail(s) into the body of the acorn to fill it (no polyfill needed for this small project).
Part 2: Acorn Stem
Use the brown yarn.
- Make a slipknot and chain 4 (you can also chain 3 if you prefer a shorter stem — both work).
- Work a slip stitch into the 2nd, 3rd, and 4th chains from the hook.
- Fasten off, pulling the yarn end through the last loop.
This forms the small curled stem for the top of the acorn.
Part 3: Acorn Cap (worked in joined rounds)
Use the brown yarn.
- Make a slipknot with a long yarn tail, then chain 2 (this ch-2 does not count as a stitch).
- Form a magic circle and work a total of 12 or 13 dc into the circle, working under both strands of the circle. (Use 13 if your yarn is on the thinner side; 12 if it’s a bit thicker — adjust based on your yarn weight.)
- Pull the circle tight to close it, then join the round with a sl st into the first dc.
- Round 2: Chain 1, then work 1 sc into every stitch around (12 or 13 sc, matching your dc count from Round 1). Join with a sl st into the first sc.
- Fasten off, leaving a long tail of about 12 inches for sewing.
Part 4: Assembly
- Using a hook, pull the two yarn ends of the stem through a few stitches into the center underside of the acorn cap, then knot the two ends together to secure the stem in place. Trim the ends short and tuck them inside, or stuff them into the acorn body.
- Thread the long tail left from the cap onto your yarn needle.
- Place the cap on top of the acorn body, pinching the two pieces together.
- Sew around the edge, working through the top of the double crochet row on the cap (leaving a small “lip” rather than sewing right at the very edge) and into the last round of the acorn body. Sew all the way around.
- Weave the yarn end back and forth two to three times to secure it, then feed it down through the center of the acorn to the bottom, pull tight, and clip — the tail will disappear inside as the stitches settle.
Your little crochet acorn is complete!
Ideas for Using Your Acorns
- Attach to a decorative belt for a dress
- Sew onto an ear warmer
- Tuck into a fall wreath
- Add a bobby pin to the base and use as a hair clip
- Pair with gnome patterns as a matching accessory
Pattern adapted from a video crochet tutorial by Lindsay of Winding Road Crochet.