crochet hat pattern
his free croet hat pattern is designed with beginners in mind and works up beautifully with simple, clear steps. Whether you’re making a warm winter accessory or a thoughtful handmade gift, this pattern will guide you through each stitch with ease. Grab your hook, choose your favorite yarn, and let’s create a stylish hat you’ll love to wear!
otes:
- To begin working with the O’Go format, carefully cut the plastic tie where the ends of the O’Go meet. Pull the tie to remove.
- For this pattern, colors can be easily separated by gently pulling apart and cutting at the color transition. Each color is ready to use. Follow the color guide shown in the Materials section (Contrast A, B, C, D, and E). You may find it helpful to place each color section in its own resealable (zip lock) bag and label each bag A, B, C, D, and E.
- Carry the color not in use loosely across the top of the round and work stitches around it.
- Change colors by drawing the new color through the last 2 loops on the hook and proceed with the new color, keeping the color change to the WS (wrong side) of the work.
- Join all rounds with a slip stitch (sl st) to the first single crochet (sc).
- Chain 1 at the beginning of each round.
- Chain 2 at the beginning of each row does not count as a stitch.
Abbreviations:
- Approx: Approximately
- Beg: Begin(ning)
- Ch: Chain(s)
- Hdc: Half double crochet
- Hdcbl: Half double crochet in back loop only
- Rem: Remaining
- Rep: Repeat
- Rnd(s): Round(s)
- RS: Right side
- Sc: Single crochet
- Sc2tog: Draw up a loop in each of the next 2 stitches. Yarn over hook (yoh) and draw through all loops on hook.
- SL st: Slip stitch
- St(s): Stitch(es)
- Tog: Together
- WS: Wrong side
- Yoh: Yarn over hook
Resources and tutorials you may find helpful in following this pattern: Crochet Abbreviations, US to UK Crochet Conversion Chart. Find links to stitches on the “Tutorial” menu: will show basic stitches used in many patterns and shows our growing collection of crochet stitch tutorials
double crochet half
double treble crochet
increiase in crochet
Change Colours in Amigurumi
Instructions
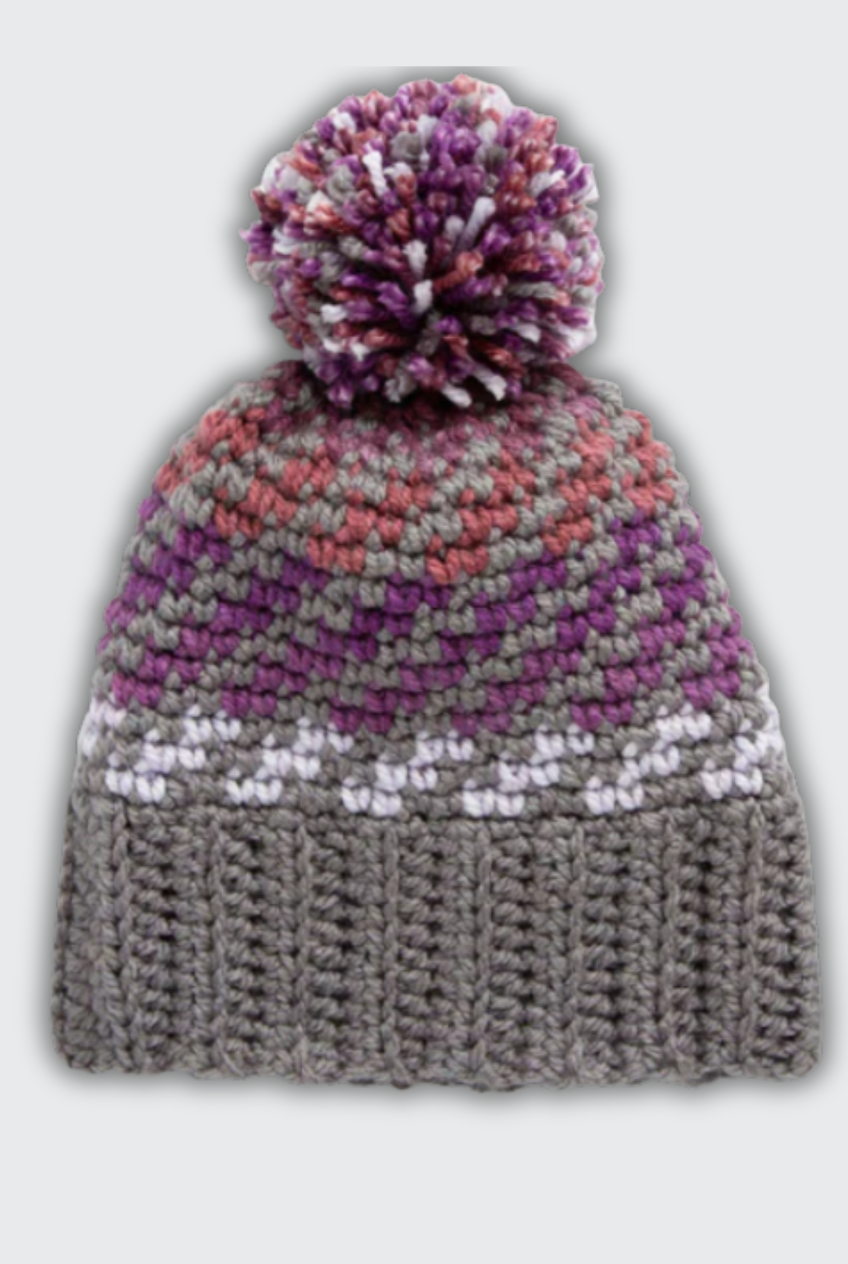
Hat
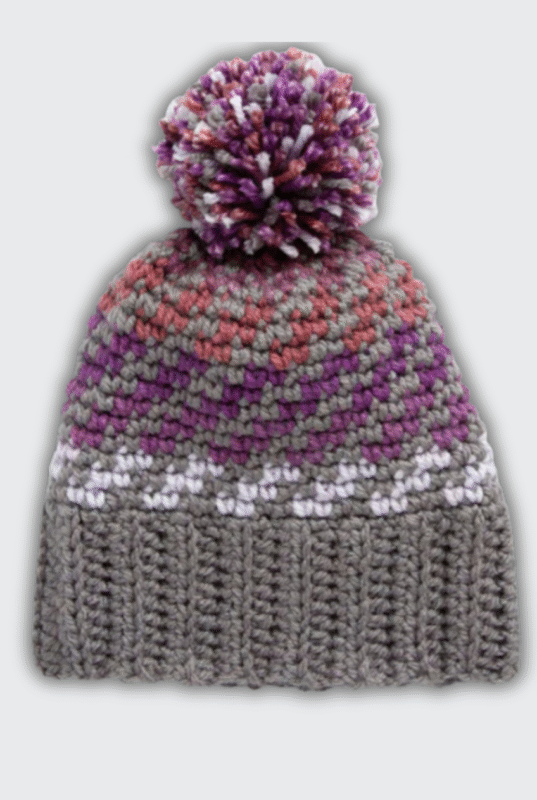
Ribbing: With the main color (MC) and the smaller hook, chain 12.
- 1st row (RS): 1 hdc in the 3rd chain from the hook. 1 hdc in each chain to the end of the chain. Turn. (10 sts)
- 2nd row: Chain 2. 1 hdcbl in each stitch to the end of the row. Turn.
Repeat the last row until the work from the beginning measures 19″ [48 cm] when unstretched, ending on a WS row. Do not fasten off. Join the last row and first row together with 1 row of sl st to form a tube. Do not fasten off.
Begin working in rounds:
Set-up round (RS): With the larger hook, chain 1. Working across the side edge of the ribbing, work 52 sc evenly around. Join. Place a marker at the end of the round.
Work the chart as follows:
- 1st to 12th rounds: Chain 1. Working in sc, work the chart to the end of the chart, reading rounds from right to left and noting the 4-st repeat will be worked 13 times. Join.
Shape top:
- 1st round: Chain 1. With MC, 1 sc in the first stitch. *With E, sc2tog. With MC, 1 sc in each of the next 2 stitches. Repeat from * to the last 3 stitches. With E, sc2tog. With MC, 1 sc in the last stitch. Join. (39 sts)
- 2nd round: With E, chain 1. 1 sc in the first stitch. *With MC, sc2tog. With E, 1 sc in the next stitch. Repeat from * to the last 2 stitches. With MC, sc2tog. Join. Break MC. (26 sts)
- 3rd round: With E, chain 1. *Sc2tog. Repeat from * around. Join. (13 sts)
- 4th round: Chain 1. (Sc2tog) 3 times. 1 sc in the next stitch. (Sc2tog) 3 times. Join. (7 sts)
Fasten off, leaving a long end. Draw the end tightly through the remaining stitches and secure tightly.
Pompom: With 1 strand each of MC, A, B, C, D, and E held together, wind
yarn around 4 fingers approximately 25 times. Remove from fingers and tie tightly in the center. Cut through each side of loops. Trim to a smooth round shape. Sew the pompom to the top of the
hat