Slip Knot Crochet
Spread the loveThis crochet Slip Knot Crochet tutorial for beginners will show you how to attach yarn to your crochet hook and so you can start crocheting right away. Before you can start any crochet project, you need to know how to make a Slip Knot Crochet A slip knot is the first loop that…
This crochet Slip Knot Crochet tutorial for beginners will show you how to attach yarn to your crochet hook and so you can start crocheting right away.
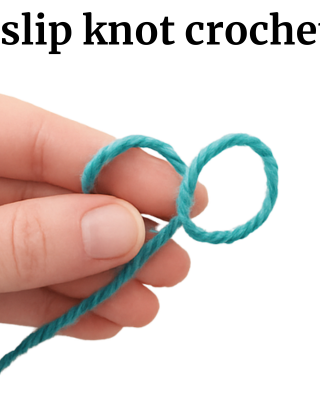
Before you can start any crochet project, you need to know how to make a Slip Knot Crochet A slip knot is the first loop that goes onto your crochet hook, and it creates a secure and adjustable starting point for your foundation chain.
You Need
- Any yarn
- A crochet hook (any size works for learning)
Resources and tutorials you may find helpful in following this pattern: Crochet Abbreviations, US to UK Crochet Conversion Chart. Find links to stitches on the “Tutorial” menu: will show basic stitches used in many patterns and shows our growing collection of crochet stitch tutorials
What Is a Slip Knot?
A slip knot is a small loop that tightens or loosens when you pull the yarn tail.
It is the first step in almost every crochet project and gives you a clean, neat starting point.
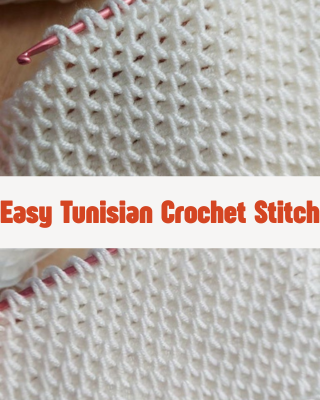
double crochet half
double treble crochet
increiase in crochet
Change Colours in Amigurumi
Why the Slip Knot Does Not Count as a Stitch
The slip knot is only used to attach the yarn to the crochet hook before you begin your foundation chain.
It does not create height, structure, or part of the actual crocheted fabric.
So What Is the First Stitch?
The first real stitch is the first chain stitch (ch 1, ch 2, etc.) that you make after the slip knot.
It is simply a starting loop.
how to make a slip knot crochet
This tutorial will walk you through the steps slowly, clearly, and with helpful tips so even complete beginners can follow easily.
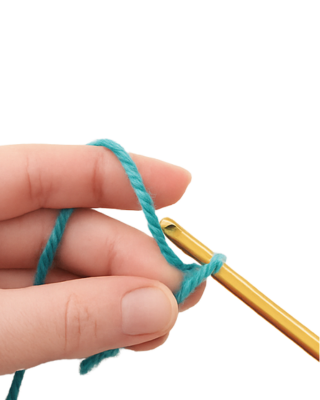
Step 1: Hold Your Yarn Correctly
- Hold the yarn in your left hand.
- The tail end should be on the left side.
- The working yarn (attached to the ball) should be on the right side.
This setup helps you avoid twisting and keeps the knot neat.
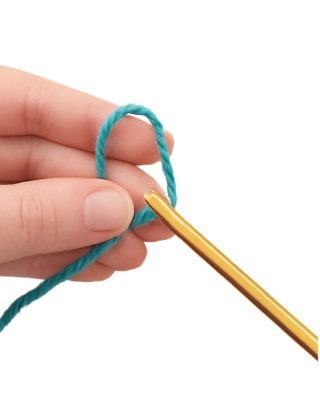
Step 2: Make a Loop
Take the tail end and place it over the working yarn to form a simple loop.
The working yarn should now be behind the tail.
Tip: Always make the loop by placing the tail over the working yarn, not the opposite, to create the correct slip-knot structure.
Step 3: Insert Your Fingers
Place your thumb and index finger inside the loop you just created.
Step 4: Grab the Working Yarn
Using your fingers, grab the working yarn (the yarn coming from the ball).Pull it through the loop to create a new small loop.
This new loop will become the slip knot.
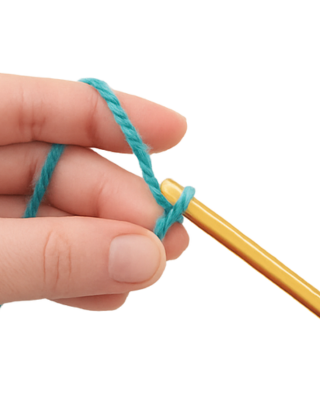
Step 5: Tighten the Knot
Pull both the tail and the working yarn to close the knot around the new loop.
Don’t tighten it too much — it should stay flexible.
Important: The loop should be able to slide smoothly when you pull the working yarn.
Step 6: Place the Loop on the Hook
Slide the loop you created onto your crochet hook. Pull the working yarn to tighten it gently around the hook, but leave some space for the hook to move.
And that’s it — you have made a slip knot!
crochet slip knot
Understanding the Slip Knot
Once the slip knot is on your hook:
Pulling the tail will undo the knot.
Pulling the working yarn will tighten it around your hook.
This makes the slip knot adjustable and perfect for starting chains
tips for Making a Slip Knot in Crochet
1. Don’t tighten the knot too much
If the slip knot is pulled too tight, it will be hard to insert your hook and your work will feel tight from the beginning.
Keep it loose and adjustable.
2. Leave a proper yarn tail
Leave a tail of about 10–15 cm (4–6 inches).
This makes it easier to weave in later and keeps your project looking neat.