How crochet ripple stitch
Spread the loveAre you looking to add a unique texture to your crochet projects? The crochet ripple stitch is a versatile and visually appealing pattern that can elevate your creations. This stitch is not only beautiful but also relatively easy to learn, making it perfect for crocheters of various skill levels. As you explore the…
Are you looking to add a unique texture to your crochet projects? The crochet ripple stitch is a versatile and visually appealing pattern that can elevate your creations. This stitch is not only beautiful but also relatively easy to learn, making it perfect for crocheters of various skill levels.
As you explore the world of crochet, understanding the crochet ripple stitch is essential for creating diverse and engaging projects. This guide will walk you through the basics of the stitch, providing a comprehensive crochet stitch guide to help you master it.
Resources and tutorials you may find helpful in following this pattern: Crochet Abbreviations, US to UK Crochet Conversion Chart. Find links to stitches on the “Tutorial” menu: will show basic stitches used in many patterns and shows our growing collection of crochet stitch tutorials
Key Takeaways
- Learn the basics of the crochet ripple stitch.
- Understand how to incorporate the stitch into various projects.
- Discover tips for mastering the crochet ripple stitch.
- Explore different patterns that utilize the crochet ripple stitch.
- Enhance your crochet skills with this versatile stitch.
Understanding the Crochet Simple Ripple Stitch
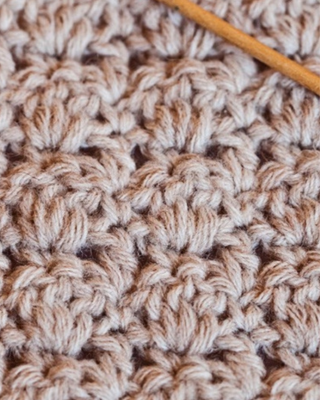
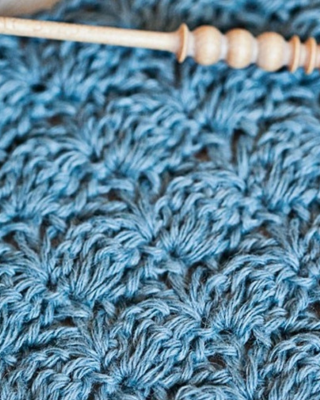
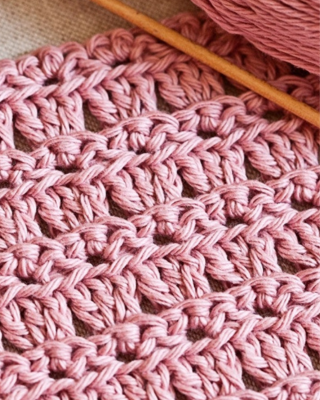
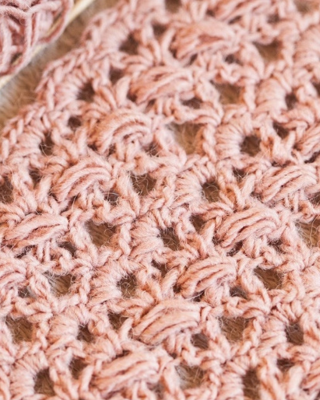
If you’re looking to add a textured element to your crochet projects, the simple ripple stitch is an excellent choice. This stitch creates a fabric with a series of peaks and valleys, giving it a dynamic and visually interesting texture. The simple ripple stitch is a versatile pattern that can be used in a variety of projects, from blankets and scarves to hats and more.
What Makes a Ripple Stitch Unique
The ripple stitch stands out due to its unique texture and visual appeal. The pattern involves creating a series of double crochet stitches and decreases that form the characteristic peaks and valleys. This stitch is not only aesthetically pleasing but also relatively simple to learn, making it accessible to crocheters of various skill levels. As noted by crochet expert, “The ripple stitch is a classic pattern that adds a touch of sophistication to any project.”
History and Popularity of Ripple Patterns
The ripple stitch has a long history in crochet, with its popularity enduring over the years. It has been a staple in many crochet patterns, particularly in home decor items like afghans and blankets. The stitch gained significant popularity in the 1960s and 1970s, and it continues to be a favorite among crochet enthusiasts today. According to a well-known crochet blog,
“The ripple stitch remains a timeless classic, offering a unique blend of simplicity and visual interest.”
Its continued popularity can be attributed to its versatility and the beautiful, textured fabric it creates.
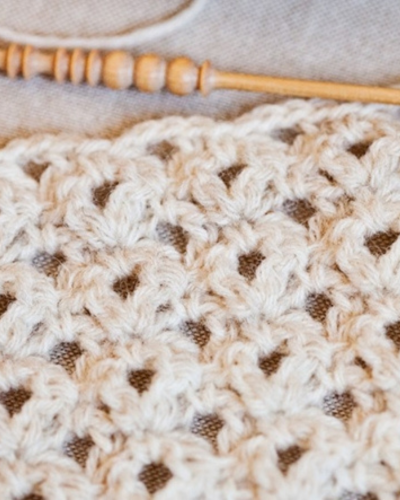
Essential Materials and Preparation
The key to a successful crochet ripple stitch project lies in the preparation and selection of the right materials. To get started, you’ll need to choose the appropriate yarn, hook, and other tools, as well as understand how to read the crochet patterns.
Yarn Selection for Ripple Projects
Selecting the right yarn is crucial for your ripple stitch project. Consider the yarn weight, fiber content, and color palette that will best suit your desired outcome. For a ripple stitch, a yarn with good stitch definition and durability is recommended. Acrylic yarns are a popular choice for beginners due to their softness and ease of care.
Hook Sizes and Other Tools
The right hook size is vital for achieving the correct tension in your crochet project. Make sure to check the recommended hook size on your yarn label or in your pattern. Other essential tools include scissors, a yarn needle for weaving in ends, and stitch markers to keep track of your place.
Reading Ripple Stitch Patterns
Understanding how to read crochet patterns is essential for any project. Look for patterns labeled as “ripple stitch” or “chevron,” and be sure to understand the abbreviations and instructions provided. Pay attention to the foundation chain and row repeat instructions to ensure you’re working the pattern correctly.
Step-by-Step Guide to the Crochet Simple Ripple Stitch
To start your crochet simple ripple stitch project, you’ll first need to create a foundation chain that will serve as the base for your entire work. This initial step is crucial as it determines the length and foundation of your project.
Creating Your Foundation Chain
To create your foundation chain, begin by making a slip knot on your crochet hook. Then, chain the desired number of stitches for your project. For a typical ripple stitch pattern, you’ll need to chain a multiple of a certain number (usually around 13 or 14 for simple ripple patterns) plus a few extra for the turning chain. For example, if you’re making a scarf, you might chain 130 plus 3 for the turning chain, giving you a total of 133 chains.
It’s essential to keep your tension even while chaining to avoid a wavy or tight edge. If you’re a beginner, it might take a little practice to get the hang of maintaining consistent tension.
Working the First Row of Peaks and Valleys
Once your foundation chain is complete, it’s time to start the first row of your ripple stitch. To do this, you’ll typically start with a double crochet (or the stitch specified in your pattern) in the fourth chain from your hook. Continue making double crochets in each chain across, following the specific pattern instructions for the number of stitches to make in each peak and valley.
The ripple stitch pattern involves alternating between peaks (where you make multiple stitches in one chain) and valleys (where you make fewer stitches). This creates the characteristic ripple effect. For the first row, follow your pattern’s instructions for the exact number of stitches and how to work them.
As you work the first row, pay attention to your tension. The fabric should be flexible and not too tight, as this can distort the ripple pattern. If you’re new to crochet, it might be helpful to watch a video tutorial to see how the stitches are made.
Continuing the Pattern in Subsequent Rows
After completing the first row, you’ll continue the ripple stitch pattern in subsequent rows. Typically, you’ll turn your work and chain a certain number (usually 2 or 3) to start the next row. Then, you’ll work double crochets (or the specified stitch) across the row, following the pattern to maintain the ripple effect.
To keep your edges neat, make sure to work the correct number of stitches in the turning chain and at the end of the row. It’s also crucial to maintain consistent tension across the row to prevent the fabric from becoming misshapen.
| Row Number | Stitches to Make | Turning Chain |
|---|---|---|
| 1 | Follow pattern for peaks and valleys | 3 |
| 2+ | Double crochet across, following pattern | 3 |
Finishing Your Project
When you’ve completed the desired length for your project, you’ll need to fasten off and weave in the ends. To do this, cut the yarn, leaving a tail long enough to weave through the stitches. Pull the yarn tail through the last loop on your hook to secure it, then use a yarn needle to weave the tail through the stitches on the wrong side of the work.
Weaving in ends neatly is important for a professional finish. Make sure to secure the yarn tail by sewing it through several stitches before cutting it close to the work.
Variations and Advanced Techniques
The crochet ripple stitch is a versatile pattern that allows for numerous variations and creative expressions. As you become more comfortable with the basic stitch, you can start to experiment with different patterns and techniques to enhance your projects.
Different Ripple Stitch Patterns
One way to vary the ripple stitch is by changing the pattern itself. You can create different visual effects by altering the number of peaks and valleys or by using different stitch heights. For example, using a double crochet instead of a single crochet can give your project a more textured look.
Some popular variations include the chevron pattern, which is similar to the ripple stitch but with a more pronounced zig-zag effect. You can also experiment with staggered ripples or offset peaks to create unique designs.
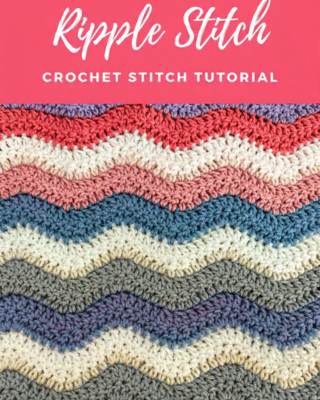
Color Changing Techniques for Ripple Designs
Color changing is a powerful technique for adding visual interest to your ripple stitch projects. You can change colors at the end of a row, in the middle of a row, or even within a single stitch. One popular method is to use a gradient effect, where you gradually change from one color to another over several rows.
To achieve a smooth color transition, it’s essential to carry the yarn up the side of your work or use a yarn needle to weave in ends as you go. This helps to prevent loose ends from showing on the wrong side of your project.
Troubleshooting Common Ripple Stitch Problems
Even experienced crocheters can encounter issues with the ripple stitch. Common problems include uneven edges, distorted ripples, and inconsistent tension. To troubleshoot these issues, it’s helpful to identify the cause of the problem.
| Problem | Cause | Solution |
|---|---|---|
| Uneven edges | Inconsistent tension or incorrect hook size | Check your tension and adjust your hook size as needed |
| Distorted ripples | Miscounted stitches or incorrect pattern repeat | Recount your stitches and ensure you’re following the pattern correctly |
| Inconsistent tension | Fatigue or lack of practice | Take regular breaks and practice regularly to improve your tension |
Tips for Maintaining Even Edges
Maintaining even edges is crucial for a professional-looking ripple stitch project. To achieve this, make sure to count your stitches carefully at the end of each row and adjust as necessary. It’s also helpful to use a stitch marker to mark the beginning of the row.
Another tip is to ensure that you’re working the correct number of stitches in each peak and valley. This will help maintain the integrity of the ripple pattern and prevent distortion.
By following these crochet tips and practicing your skills, you can create beautiful, professional-looking ripple stitch projects that showcase your creativity and technique.
Conclusion
Now that you’ve learned the fundamentals of the crochet ripple stitch, you’re ready to put your new skills into practice. This versatile stitch can be used to create a wide range of projects, from cozy blankets to stylish garments.
As you’ve seen throughout this crochet guide, the ripple stitch is a valuable addition to any crocheter’s repertoire. By mastering the simple ripple stitch, you’ll be able to tackle more complex patterns and create beautiful, textured fabrics.
In summary, the crochet ripple stitch is a fun and rewarding stitch to learn, offering a crochet ripple stitch summary that highlights its unique characteristics and versatility. As you continue to practice and experiment with different yarns and colors, you’ll find that this stitch becomes a staple in your crochet toolkit.
With this crochet guide conclusion, you’re now equipped to take your crochet skills to the next level. So, grab your hook and yarn, and get ready to create something beautiful with the crochet ripple stitch.
FAQ
What is the crochet ripple stitch?
The crochet ripple stitch is a popular stitch that creates a textured, wavy pattern. It’s a versatile stitch used in various crochet projects, including blankets, scarves, and hats.
What makes the ripple stitch unique?
The ripple stitch is unique due to its distinctive wavy pattern, created by alternating between peaks and valleys. This stitch is both visually appealing and adds texture to your crochet projects.
What yarn is best for ripple stitch projects?
The best yarn for ripple stitch projects depends on the desired texture and warmth. Acrylic yarns are great for beginners, while cotton yarns are perfect for spring and summer projects. You can also use blends like wool and acrylic for a soft, warm finish.
How do I read ripple stitch patterns?
Reading ripple stitch patterns involves understanding the abbreviations and symbols used. Typically, patterns will specify the stitch count, row repeats, and any special stitches. You can also look for tutorials or guides that break down the pattern step-by-step.
What are some common issues with the ripple stitch, and how can I troubleshoot them?
Common issues with the ripple stitch include uneven edges, inconsistent tension, and miscounted stitches. To troubleshoot, check your stitch count, adjust your tension, and make sure to count your stitches accurately.
Can I use different colors with the ripple stitch?
Yes, you can use different colors with the ripple stitch to create unique, multi-colored designs. To change colors, simply complete the last stitch of the row with the new color, then continue with the new color.
How do I maintain even edges with the ripple stitch?
To maintain even edges with the ripple stitch, make sure to count your stitches accurately and keep your tension consistent. You can also use a stitch marker to mark the beginning of the row and help you keep track of your place.