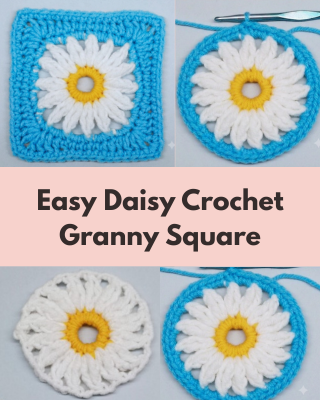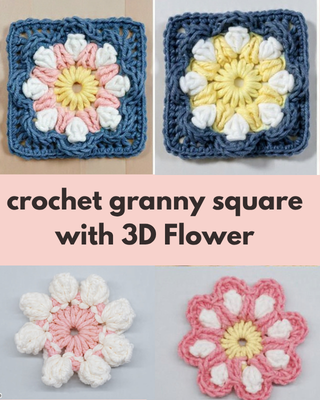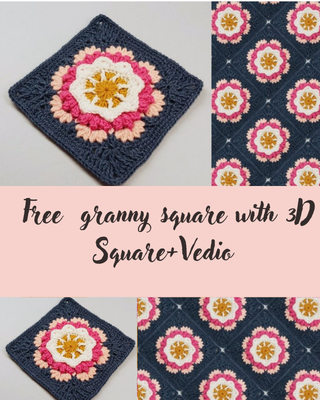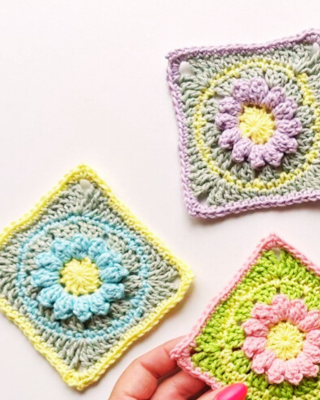
Are you looking for a beautiful granny square with a unique textured design? This Textured Granny Square is a lovely crochet project that combines decorative post stitches, delicate clusters, and
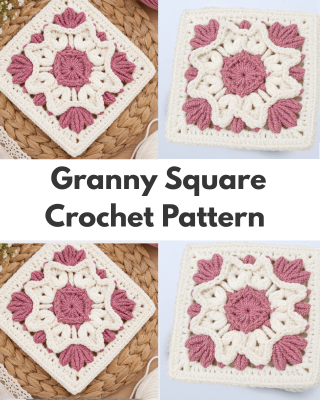
three beautiful yarn colors to create an eye-catching square. It’s perfect for adding a handmade touch to crochet blankets, pillow covers, bags, and other colorful projects.
Have you ever wanted to make a granny square that looks a little different from the traditional design? This motif features raised stitches and pretty textured details that make each round special. Although Rounds 4 and 5 require a little extra attention, following the instructions step by step will help you create this beautiful design.
The square is worked over seven rounds using fine-weight yarn and a 3 mm crochet hook, with a finished size of approximately 4.5 inches (11.5 cm). You can follow the suggested three-color combination or choose your favorite shades to match your next crochet project.
Ready to get started? Gather your yarn and hook, and let’s crochet this lovely textured granny square together!
Materials You’ll Need
- Fine yarn (weight 2) in three colors: A, B, and C
- 3 mm crochet hook
- Yarn needle
- Scissors
Pattern Information
- Pattern: Textured Granny Square (Motif #158)
- Finished size: Approximately 4.5 in (11.5 cm)
- Number of rounds: 7
- Yarn weight: Fine (weight 2)
- Hook size: 3 mm
- Colors: 3
- Terminology: US crochet terms
Abbreviations
- st(s) – stitch(es)
- sl st – slip stitch
- ch – chain
- sc – single crochet
- hdc – half double crochet
- dc – double crochet
- tr – treble crochet
- fp – front post
- bp – back post
- fpsc – front post single crochet
- bpsc – back post single crochet
- fpdc – front post double crochet
- fptr – front post treble crochet
Standing stitch: The first stitch made directly with the new yarn, without a starting chain.
More Granny Square
- EASY Crochet Pumpkin Granny Square
- Crochet baby girl blanket with 3D flow
- Easy Daisy Crochet Granny Square
- granny square for baby girl blanket
Special Stitches
Cluster of 2dc: Yarn over, insert the hook into the indicated stitch or space, yarn over and pull up a loop, yarn over and pull through 2 loops. Repeat once in the same stitch or space. You will have 3 loops on the hook. Yarn over and pull through all 3 loops.
Cluster of 3dc: Make 3 unfinished double crochet stitches in the same stitch or space, leaving 4 loops on the hook. Yarn over and pull through all 4 loops.
Cluster of 2tr: Yarn over twice, insert the hook into the indicated stitch or space, yarn over and pull up a loop, then yarn over and pull through 2 loops twice to make one unfinished treble crochet. Repeat in the same place to make a second unfinished treble crochet. With 3 loops on the hook, yarn over and pull through all 3 loops.
Cluster of 3tr: Make 3 unfinished treble crochet stitches in the same stitch or space, leaving 4 loops on the hook. Yarn over and pull through all 4 loops.
How to Read the Pattern
Each round is worked around the four sides of the square. The instructions between the asterisks (*) are repeated 4 times in total.
When a round begins with a standing stitch or cluster, the last stitch or cluster of the fourth repeat is omitted. Join the round with a slip stitch to the standing stitch or cluster, as instructed.
Textured Granny Square Instructions
Round 1 – Color A
Make a slip knot and chain 3. Insert the hook into the first chain, yarn over, and pull through to form a ring.
Chain 2, then work 16 dc into the ring. Join to the first dc with a slip stitch.
Round 2 – Color A
Chain 1 (does not count as a stitch). Work a front post single crochet (fpsc) around the same stitch.
Chain 2. Work a back post single crochet (bpsc) around each of the next 3 stitches. Chain 2. Work a front post single crochet (fpsc) around the next stitch.
Repeat the instructions between the asterisks 4 times in total, leaving out the final fpsc. Join to the first fpsc with a slip stitch.
Fasten off and weave in the ends.
Round 3 – Color B
Join Color B with a standing cluster of 2dc in any chain-2 space immediately following an fpsc.
Chain 3. Skip the next 3 stitches. In the next chain-2 space, work (cluster of 2dc, ch 1, cluster of 2dc). Chain 2. Skip the next stitch. In the next chain-2 space, work (cluster of 2dc, ch 1, cluster of 2dc).
Repeat the instructions between the asterisks 4 times in total, leaving out the final cluster. Join to the standing cluster with a slip stitch.
Fasten off and weave in the ends.
Round 4 – Color C
Join Color C with a standing fpsc around any final cluster that comes immediately before a chain-3 space.
*Work 1 sc in the chain-3 space. Working in front of that same chain-3 space, work 1 tr into the second bpsc of Round 2. Work 1 sc in the same chain-3 space of Round 3. Work 1 fpsc around the next stitch.
In the chain-1 space, work (hdc, 3 dc, hdc). Working in front of the chain-2 space, work 1 fptr around the fpsc of Round 2. Skip the chain-2 space of Round 3. Work 1 fpsc around the next stitch.
In the next chain-1 space, work (hdc, 3 dc, hdc). Work 1 fpsc around the next stitch.*
Repeat the instructions between the asterisks 4 times in total, leaving out the final fpsc. Join to the standing fpsc with a slip stitch.
Fasten off and weave in the ends.
Round 5 – Color A
Join Color A with a standing cluster of 3dc in any chain-3 space of Round 3. Work behind the fptr of Round 4, placing the cluster between the two sc made in that same chain-3 space.
*Chain 2. Work a bpsc around the second dc along, skipping the fptr, fpsc, hdc, and dc.
Chain 2. Working behind Round 4, in the chain-2 space of Round 3, work (cluster of 2tr, ch 1, cluster of 3tr, ch 1, cluster of 2tr).
Chain 2. Work a bpsc around the next second dc.
Chain 2. Work a cluster of 3dc in the chain-3 space of Round 3, behind the fptr of Round 4 and between the two sc made in that same chain-3 space.*
Repeat the instructions between the asterisks 4 times in total, leaving out the final cluster. Join to the standing cluster with a slip stitch.
Fasten off and weave in the ends.
Round 6 – Color B
Join Color B with a standing fpsc around any cluster of 3dc.
*Work 2 sc in the chain-2 space. Work 1 fpsc around the next stitch. Work 2 sc in the next chain-2 space. Work 1 fpsc around the next stitch.
In the chain-1 space, work (sc, hdc). Around the next stitch, work (fpdc, ch 1, fpdc). In the next chain-1 space, work (hdc, sc).
Work 1 fpsc around the next stitch. Work 2 sc in the chain-2 space. Work 1 fpsc around the next stitch. Work 2 sc in the next chain-2 space. Work 1 fpsc around the next stitch.*
Repeat the instructions between the asterisks 4 times in total, leaving out the final fpsc. Join to the standing fpsc with a slip stitch.
Round 7 – Color B
Chain 1 (does not count as a stitch). Work 1 sc in the same stitch.
Work 1 sc in each of the next 9 stitches. In the chain-1 space, work (sc, ch 1, sc). Work 1 sc in each of the next 10 stitches.
Repeat the instructions between the asterisks 4 times in total, leaving out the final sc. Join to the first sc with a slip stitch.
Fasten off and weave in the ends.
Finishing Your Granny Square
Once you have completed all seven rounds, fasten off and weave in any remaining loose ends with your yarn needle. Gently shape your square if needed to help the edges and corners lie flat.
Your Textured Granny Square is now ready to use! Make several squares in matching or contrasting colors to create a beautiful blanket, cushion cover, or other handmade crochet project.
Helpful Notes
- Rounds 4 and 5 require extra attention. These rounds involve working front post and back post stitches in front of or behind earlier rounds.
- Keep your finished-square photo nearby as a visual reference while working through the textured stitches.
- The corner in Round 7 is formed by working (sc, ch 1, sc) into the chain-1 space.
- The original round diagrams were not available in the supplied text, so the written instructions above follow the provided pattern text.