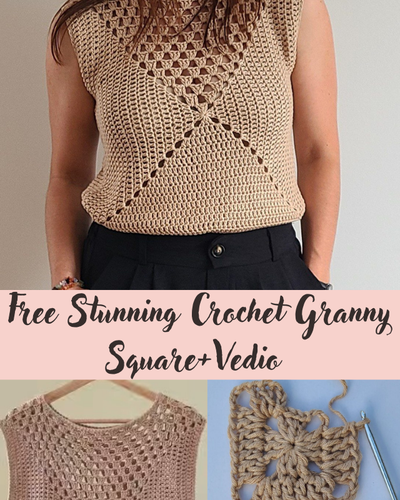
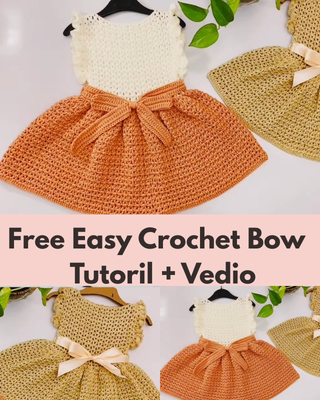
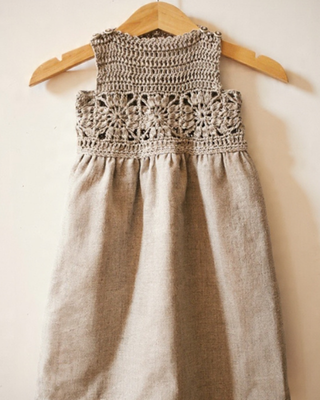
tutorial granny square crochet fabric dress
Here are some helpful resources you may find useful while working through this amigurumi pattern:
• Crochet Abbreviations Guide
• US–UK Crochet Conversion Chart
You can also explore the “Tutorials” menu to find step-by-step guides. There you’ll discover:
• Basic crochet stitches commonly used in many amigurumi projects
• Detailed stitch tutorials to help you build your skills
stitch used
st(s) – stitch(es)
ch – chain stitch
sc – single crochet
dc – double crochet
sl st – slip stitch
any sport weight yarn, approx. 50g for
smaller size and up to 100g for bigger sizes (I used
linen/viscose blend yarn, but any other yarn will
work just fine. With the yarn weight you can also
make experiments and use some thicker yarn as well.
In this case you will simply have to make less squares.
crochet hook 3.25mm (D) or size needed to obtain
gauge
4 small buttons (can use only 2 if prefer)
tapestry needle
fabric (two pieces each 15x18inches for baby size or
18x21inches for toddler size
4 stitch markers (optional, you can use contrasting
color yarn as well to mark stitches)
pins (optional)
sewing machine (optional, all seams can be hand
sewn as well)
Tutorial is written for two sizes, but it is extremely easy to
make it in any other size. All you need to do is to make as
many squares as needed to make it fit around child’s chest.
And then cut the fabric according to your own measurements – desired length and width of the skirt part.
Baby (9-12months)
Toddler (up to 3 years)
Foundation ring: Ch4, join
Rnd 1: ch4 (counts as first dc and ch1), dc into the ring, ch1, repeat from * 10 times more, join with sl st in first dc
Rnd2: sl st in first ch-1 space, ch2, 3-dc bobble in same ch-1
space,
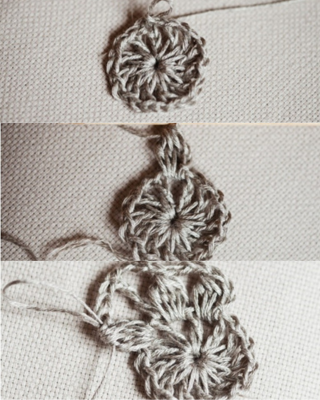
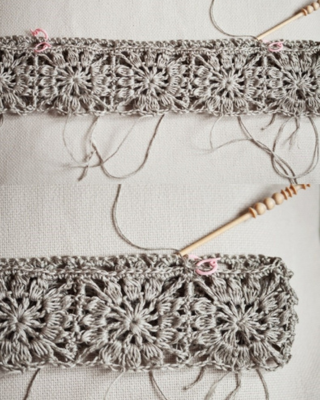
ch2, 4-dc bobble in next ch-1 space, ch3, tr in next dc, ch3, 4 dc bobble in next ch-1 space, ch2, 4-dc bobble in next ch-1 space, look image
repeat from * twice more, ch2, 4-dc bobble in next ch-1 space,
ch3, tr in next dc, ch3, 4-dc bobble in next ch-1 space, ch2,
join with sl st in top of first 3-dc bobble. Fasten off. look image
When joining the squares take care that all tails (the ones from
each square) you leave on the same side. In other words – for
top part there should be less tails left, only the ones from
joining, but all the rest of tails go on bottom. Join all squares
until you have a long line of them. Now join in the same way
first and last square to shape a big ring. Fasten off.

It looks quite scary right now with all those tails, but NO
worries! We will get rid of them very, very easily! First step is
to trim them, so that they all are more or less in same length
and approximately 2inches long.
Working on the edge where you have fewer tails (this will be
top part), join yarn in any joining seam and work evenly sc all
around hiding the tails between stitches – you have to work
sc leaving the tails between stitches.
Take care that you hide in this way all the tails.
Join with sl st in first sc. Don’t fasten off.
Now mark where the armholes will be. For smaller sizes I
suggest to leave one square for the arm, for bigger sizes you
can leave up to two squares. It is not said that you have to
leave entire square. You can choose. Just take care that it all
looks symmetrically correct. First marker goes into the same
stitch (or just the one next to is) where is opened loop from
previous round.
And now you can actually choose – or you make the skirt part
from fabric, or you make the dress entirely crocheted.
If you prefer second version, don’t fasten off, but work next
rnd increasing stitches – you can double them for extra wide
skirt part or increase stitch amount just slightly.
How to increase – work 2dc in next st. You can work 2dc in
each next st, or work 2dc in next st, 1dc in next st, and
repeat it all around. Then work evenly dc in each stitch until
the dress is long enough. The length of the dress you can
choose as well, and the best way is to adjust it for each child’s
needs and for the way it will be worn later. When it is long
enough work the last rnd in following way, to add nice edging:
Edging: ch3, skip next st, sl st in next st, repeat from * to
end. Fasten off.
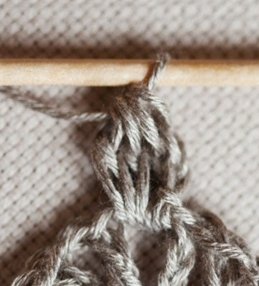
3-dc bobble- work 3 incomplete dc stitches by leaving the last
loop of each stitch on hook, so that 4 loops remain on hook.
Yarn over and draw through all loops on hook. Stitch
completed.
4-dc bobble – work 4 incomplete dc stitches by leaving the
last loop of each stitch on hook, so that 5 loops remain on
hook. Yarn over and draw through all loops on hook. Stitch
completed.
Make 8 for baby size and 10 for toddler size, or as many as
needed for any other size or if using different kind of yarn.
First I suggest to weave in the ends which remained at the
centre of each square. With other ends we will deal later.
Now you have to join the squares.
Starting from the tr on the angle of the square join both pieces
working sc evenly across.
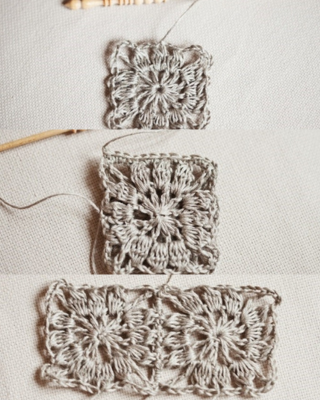
Sure there are many different ways how to join the squares and
this one is probably the most primitive way, but it works well
and I am totally happy with the result.
Only in case you are using much thicker yarn, like worsted
weight yarn, it would be better to join the squares with other
method, for example with sewn stitches.
And now work top front in the following way:
Row 1: Ch3 (counts as first dc), dc in each next st until next
marker, turn
Row 2: ch3 (counts as first dc), dc in each dc to end, turn
Repeat Row 2 – four times for baby size and six times for
toddler size (or as many times as needed to get desired length)
Last row: ch3, skip next st, sl st in next st, repeat from * to
end. Fasten off. (you can work ch4, or even ch5 instead, especially if
you prefer to use bigger buttons, as these will serve as button loops)
Skip the squares left for armhole. Join the yarn into the next
marked stitch, and repeat instructions for the Top front.
Now you have to work across the bottom edge. Join the yarn
on the side of the dress and work evenly sc across hiding all
the tails between stitches as you did for the top, join with sl st
in first sc.
Rnd 2: ch3 (counts as first dc), dc in each stitch to end, join
with sl st in top ch of ch-3
Rnds 3-5: ch1, sc in each st, join with sl st in first sc.