crochet butterfly pattern
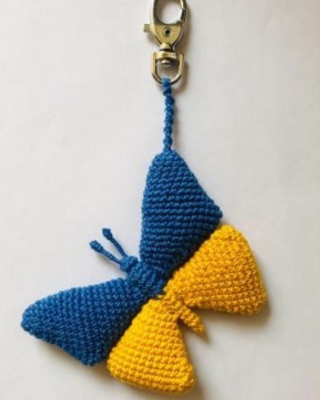
Crochet butterflies pattern are one of the sweetest and easiest little projects you can make. Whether you’re a beginner learning new stitches or an experienced crocheter looking for a quick decorative piece, this crochet butterfly pattern is the perfect choice. With just a few simple steps, you can create a charming butterfly that works beautifully as an appliqué, keychain, bookmark, hair accessory, or to decorate blankets and baby items.
This pattern uses basic stitches, works up in just a few minutes, and is a fun way to use leftover yarn. Choose your favorite colors and bring your tiny butterfly to life — soft, cute, and full of personalit
Resources and tutorials you may find helpful in following this pattern: Crochet Abbreviations, US to UK Crochet Conversion Chart. Find links to stitches on the “Tutorial” menu: will show basic stitches used in many patterns and shows our growing collection of crochet stitch tutorials.
Materials:
1 Yarn :
❖ for a brooch – DMC cotton perle (100% cotton, 10g/ 80m) blue (№ 798) and
yellow (№ 972) colors.
❖ for a keychain – VICTORIA AZIRA (100% coton, 50g/ 225 м.) blue (№ 137)
and yellow (№ 3863) colors.
The recommended yarn can be replaced with any similar yarn.
2 Fiber filler.
3 Wire, d= 0.3 mm, used for antennae.
4 Fast drying glue, small container for the glue (or plastic cap of a bottle), toothpick.
5 Sewing thread of the same colors.
6 Carabiner or ring for the keychain, a safety pin – for the brooch.
7 Crochet hook № 1.5 for the DMC cotton perle yarn, a hook № 2 for the VICTORIA
AZIRA yarn.
8 Scissors.
9 Needle.
Abbreviations :
- ch – chain / s.
- st / sts – stitch / es.
- sl st – slip stitch.
- sc – single crochet.
- inc – make 2 sc in 1 stitch.
- inc3 – make 3 sc in 1 stitch.
- dec – crochet 2 stitches together as sc.
- dec3 – crochet 3 stitches together as sc.
- Make decreases in front loops only.
(…) – number of stitches in the row / round.
(…)* – repeat stitches in the brackets specified times.
The parts are made in spiral rounds or in back-and-forth rows.
To mark the beginning of the rows, it is better to use a marking thread. It is not
necessary to align the beginning, the marking is only needed to indicate the
beginning of the row, since all increases and decreases are calculated from the
beginning of the row.
In this pattern, increases and decreases of two and three stitches are used.
When crocheting the lower wings, shift stitches are used.
This pattern contains a detailed instruction to create the butterfly
- double crochet half
- double treble crochet
- increiase in crochet
- Change Colours in Amigurumi
free crochet butterfly pattern
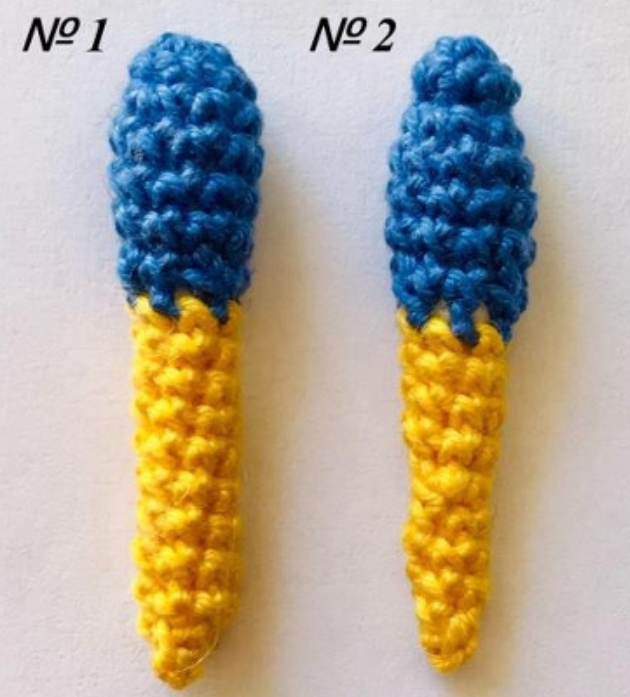
Body
I propose 2 different crochet patterns of the body: a simple option ( the result is
shown in the photo below, № 1) and a more complex one (see the photo, № 2). I
named it “complex” because it has more small works and is more detailed. Choose
any option convenient for you.
The body is made in spiral rounds for both options.
The part is narrow, so stuff it as you go.
Simple pattern
Start with the blue yarn.
1) 6 sc in a magic ring.
2) 6 sc.
3) (1 inc, 1 sc)3 (9 sc).
4) – 6) 9 sc (3 rounds). Stuff.
7) (1 dec, 1 sc)3 (6 sc
Change the blue yarn to the yellow one.
8) – 17) 6 sc (10 rounds).
Fasten off, stuff, close the final hole with a needle.
More complex pattern
Start with the blue yarn.
1) 6 sc in a magic ring.
2) 6 sc.
3) 6 sl st.
4) (1 inc, 1 sc)3 (9 sc). 5) – 7) 9 sc (3 rounds). Stuff. 8) (1 dec, 1 sc)3 (6 sc).
Change the blue yarn to the yellow one.
9) – 12) 6 sc (4 rounds).
13) (1 dec, 1 sc)*2 (4 sc).
14) – 17) 4 sc (4 rounds).
Fasten off, stuff, close the final hole with a needle
Upper wings
Make 2 pieces.
The right and left wings are crocheted the same, using the blue yarn.
Start in spiral rounds.
1) 6 sc in a magic ring.
2) 2 sc, 1 inc3, 2 sc, 1 inc (9 sc).
3) 3 sc, 1 inc3, 4 sc, 1 inc (12 sc).
4) 12 sc.
5) 4 sc, 1 inc3, 5 sc, 1 inc, 1 sc (15 sc).
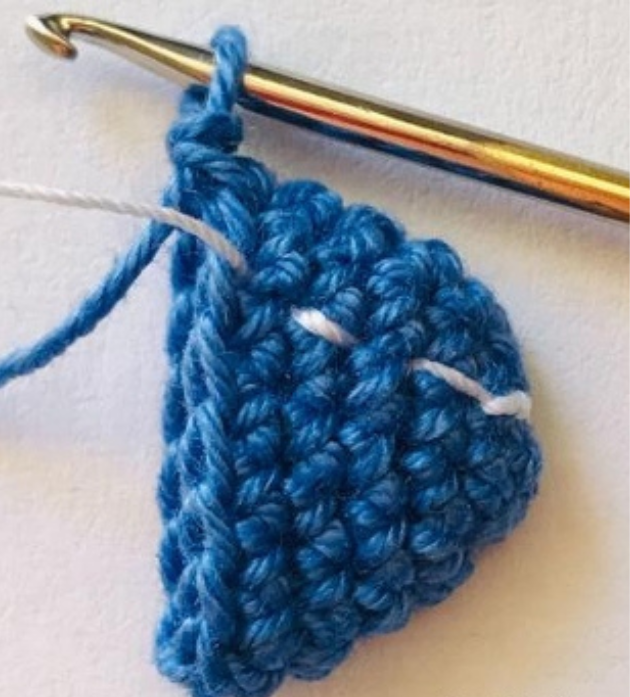
6) 15 sc.
In the photo below: the white thread shows the beginning of rounds
Ravelry free crochet Butterfly patterns (PDF)
7) 6 sc, 1 inc3, 6 sc, 1 inc, 1 sc (18 sc).
8) 7 sc,1 inc3, 10 sc (20 sc).
9) 8 sc, 1 inc3, 9 sc, 1 inc, 1 sc (23 sc).
10) 9 sc, 1 inc3, 13 sc (25 sc).
11) 10 sc, 1 inc3, 14 sc (27 sc).
12) 27 sc.
13) 11 sc, 1 dec3, 13 sc (25 sc).
14) 10 sc, 1 dec3, 12 sc (23 sc).
15) 9 sc, 1 dec3, 11 sc (21 sc).
16) 8 sc, 1 dec3, 10 sc (19 sc).
17) 7 sc, 1 dec3, 9 sc (17 sc).
18) 6 sc, 1 dec3, 8 sc (15 sc).
19) 5 sc, 1 dec3, 6 sc, 1 sl st (13 sts).
The next round is a shortened one.
20) 1 sl st, 3 sc, 1 dec3, 3 sc, 1 sl st, 1 ch (9 sts).
simple crochet butterfly pattern
Turn the crochet and continue in the opposite direction.
21) starting in the 3rd stitch from the hook: 5 sc, 1 sl st. Fasten off, cut the yarn,
weave the final tail in.
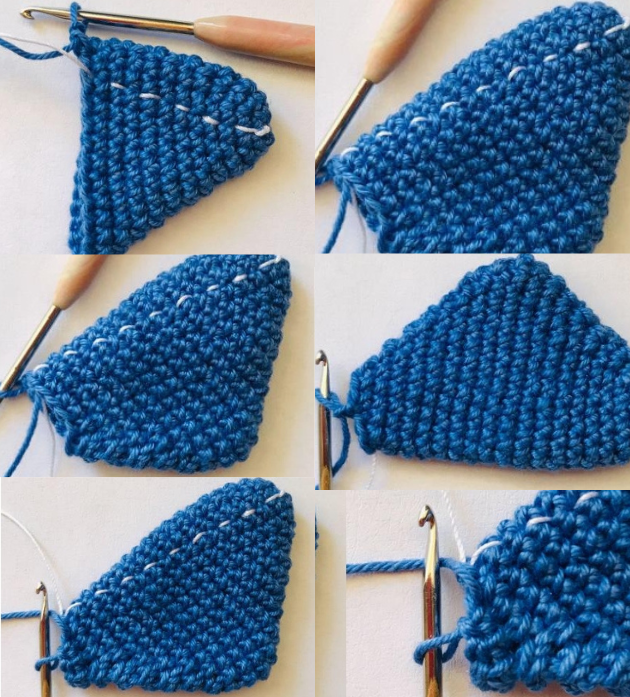
We have such wings now.

simple large butterfly crochet pattern free
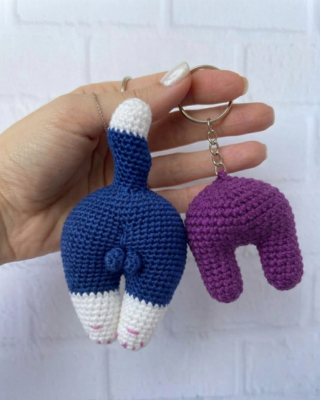
Lower wings
Make 2 pieces.
The right and left wings are made the same.
When crocheting the lower wings, make shift stitches (how to do it is indicated
below).
Start in spiral rounds.
Using the yellow yarn, make a chain of 13 loops. It’s the base of the 1st round. Work
around.
1) starting in the 2nd stitch: 11 sc, 1 inc3 in the last stitch, 10 sc in the opposite
direction, 1 inc in the last st (26 sc).
2) (12 sc, 1 inc3)*2 (30 sc).
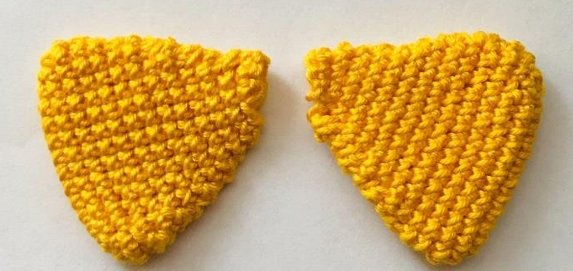
3) 30 sc (Photo № 1, № 2).
Make a shift stitch: crochet the next stitch (the 1st stitch of the round) as sc, place
the marking thread after it. Your 2nd stitch is the 1st stitch now (Photo № 3, № 4).
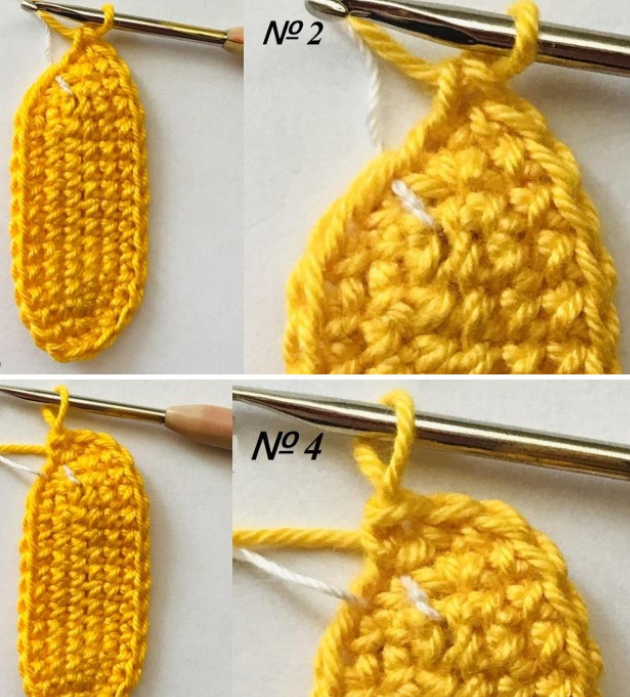
All the shift stitches are made the same.
4) (12 sc, 1 dec3)*2 (26 sc).
5) 26 sc.
Make a shift stitch.
6) (10 sc, 1 dec3)*2 (22 sc).
7) 22 sc.
Make a shift stitch.
8) (8 sc, 1 dec3)2 (18 sc). 9) 18 sc. Make a shift stitch. 10) (6 sc, 1 dec3)2 (14 sc).
11) 14 sc.
Make a shift stitch.
12) (4 sc, 1 dec3)*2 (10 sc).
The next round is a shortened one.
13) 3 sc, 1 sl st, 1 ch.
Turn the crochet and continue in the opposite direction.
14) starting in the 3rd st from the hook: 5 sc, 1 ch. Fasten off, cut the yarn, weave
the tail in.
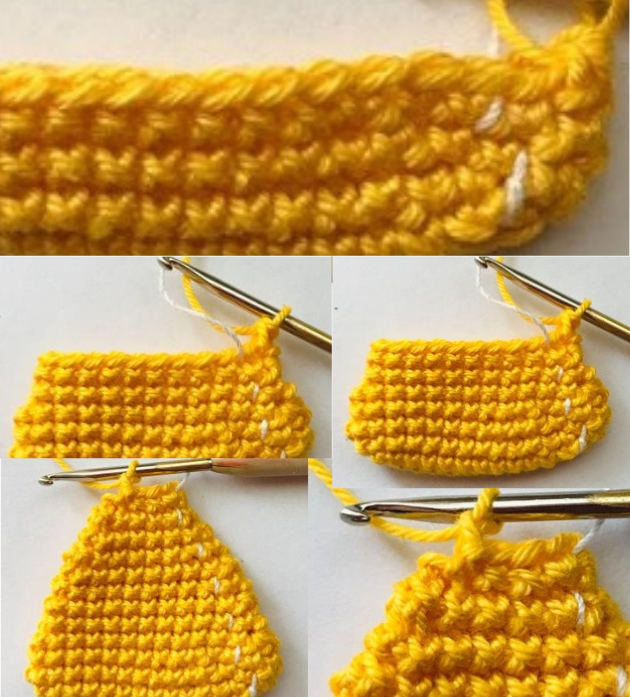
In the photo below: both sides view the part.
We have such wings now.
Assembling
1 Make antennae of the butterfly.
Cut a piece of wire 8 – 9 cm long.
Insert it in the top part of the head, bend in half. It’s the base of the antennae.
Now you need to wrap the wire with the blue yarn.
Using a hook or needle, pull the yarn through the head close to the wire. The length
of the initial yarn tip should be equal to the length of the wire.
Cover the yarn tip with the glue and wrap the wire using the long part of the yarn.
To avoid getting a large amount of glue on the antennas and, as a result, the
appearance of glue spots, it is better to put the glue with a toothpick, and not
squeeze it out of the tube
Put just a tiny bit of the glue into the container (I use a plastic water bottle cap).
Using a toothpick, cover the yarn initial tip with the glue. Wrap 1.5 – 2 cm of the
antennae with the yarn, covering the wire and the yarn initial tip under the winding.
To look more like real antennae, they should have thicker ends. Therefore, you need
to wrap 4 – 5 mm of wire in the opposite direction (indicated by the red arrow in the
photo below), then wrap 4 – 5 mm towards the top (indicated by the green arrow in
the photo).
Cut the yarn and wire. The 1st antenna is ready.
The 2nd antenna is made the same.
2 Stuff the wings.
Wings are stuffed loosely, just to give shape.
They should be flat, so after stuffing, it is better to press each part with your fingers
on both sides to give a smooth surface
3 Sew the wings.
4 Make a cord for a keychain.
To create a keychain, you need a carabiner / ring and the blue yarn. To attach the
figurine to the carabiner, I propose to weave a cord using the macrame technique.
Cut a piece of yarn 80 cm long, use a needle to thread it into the upper wing and fold
it in half
Pass the ends of the yarn through the carabiner ring, make one turn.
Choose the appropriate length of the future cord and fix it with a knot.
The length of my cord is 3 cm.
We got 2 threads in the center and one on each side (Photo № 1, № 2). In photo №
2, yarn of different colors was used for clarity.
The central threads are the basis for the cord, on which the knots are knitted. To
make a beautiful cord, I use a knot named “Macrame Single Flat Knot”. How to do it
is shown in the photos № 3, № 4, № 5, № 6, № 7.
In photos № 1, № 3 and № 6, the blue yarn shows cord weaving for the keychain.
In photos № 2, № 4, № 5 and № 7, the same steps are shown using colored yarn.