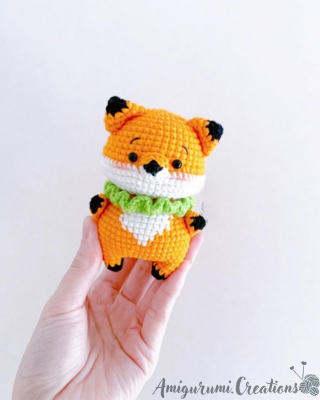
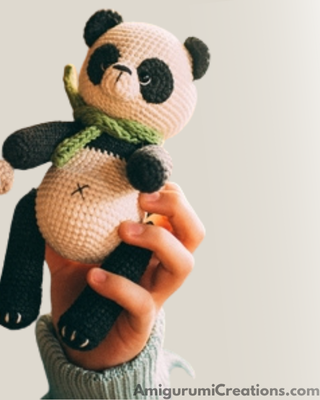
Easy & Free Panda Crochet Pattern (Amigurumi pattern) 2025

I’ve wanted to make a Free Panda Crochet Pattern for a while now, but I knew I wanted it to be just right—not too big, not too fussy, and most importantly, easy to love. After testing a few versions (some with bigger heads, some with floppy limbs), I finally landed on this little guy.
So grab your favorite yarn and let’s get started. I hope this little panda brings as much joy to your hook as it did to mine. crochet winnie the pooh – free pattern
Materials needed for crocheting a Panda
- Yarn:
YarnArt Jeans (160 m/50 g)- color 48 (beige) 1 skein- color 03 (cream) for muzzle- color 70 (brown) for details- color 85 (orange) for scarf
Can be substituted with any Fingering yarn
with the same meterage. - Crochet hook (I use 1.,75 (US 4))
- Toy stuffing (sintepon, holofiber)
- Eyes (I use 4 mm sew-on beads)
- Needle, stitch marker, scissors, long needle
for thread jointing - Strong cotton thread for thread jointing
- 2 straight knitting needles for scarf knitting
- Blush (I use a beauty blush)
Abbreviations
- mr – magic ring
- sc- single crochet
- inc – increase
- dec – decrease
- st, sts – stitch, stitches
- In this pattern we use US terminology.
- hdc – half double crochet
- (…) – total number of stitches in round
- (…) x times – repeat the instruction in
- brackets x times
free panda crochet pattern pdf for beginners
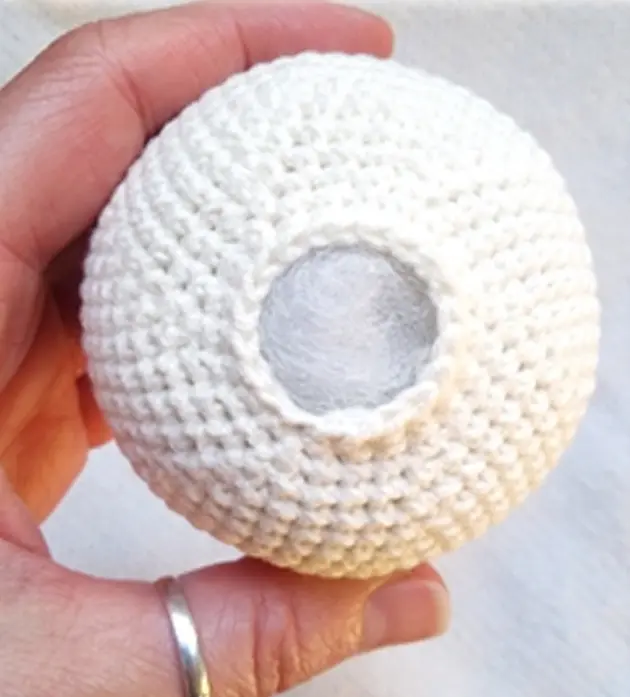
Head (in cream color)
1 round 6 sc in mr
2 round 6 inc (12)
3 round (1 sc inc) х 6 times (18)
4 round (2 sc inc) х 6 times (24)
5 round (3 sc inc) х 6 times (30)
6 round (4 sc inc) х 6 times (36)
7 round (5 sc inc) х 6 times (42)
8 round (6 sc inc) х 6 times (48)
9 round (7 sc inc) х 6 times (54)
10 round (8 sc inc) х 6 times (60)
11-20 rounds (60) (10 rounds)
Head details
Sew the muzzle under the round 16.
Add some stuffing while sewing it to the
head.
Embroider the nose with the thread
of brown color. Divide it into 4 thin
strands. Embroider the nose above
the second round of the muzzle. I
make 5-6 horizontal stitches and one
vertical stitch.
Sew the eyes under the round 17, 7 sts
apart. Embroider the eyebrows above the
eyes with the thread of brown color.
Sew the ears under the round 7.
Add blushes to the bear’s cheeks.
21 round (8 sc dec) х 6 times (54)
22 round (7 sc dec) х 6 times (48)
23 round (6 sc dec) х 6 times (42)
24 round (5 sc dec) х 6 times (36)
25 round (4 sc dec) х 6 times (30)
Start to stuff the piece.
26 round (3 sc dec) х 6 times (24)
27 round (6 sc dec) х 3 times (21)
28 round (21)
Stuff the head (I stuff very firmly and
evenly). Secure the thread; weave in end
inside of the piece.

Body
(start to crochet in cream color)
1 round 6 sc in mr
2 round 6 inc (12)
3 round (1 sc inc) х 6 times (18)
4 round (2 sc inc) х 6 times (24)
5 round (3 sc inc) х 6 times (30)
6 round (4 sc inc) х 6 times (36)
7 round (5 sc inc) х 6 times (42)
8 round (6 sc inc) х 6 times (48)
9 round (7 sc inc) х 6 times (54)
10-15 rounds (54) 6 rounds
16 round 8 sc, 6 dec, 34 sc (48)
17-19 rounds (48) 3 rounds
20 round (6 sc dec) х 6 times (42)
21 round (42)
22 round in black color (42)
23 round (5 sc dec) х 6 times (36)
Secure the thread of cream color inside of the piece, fasten off.
24 round (36)
25 round (4 sc dec) х 6 times (30) start stuffing the piece
26 round (30)
27 round (3 sc dec) х 6 times (24)
28 round (24)
29 round (6 sc dec) х 3 times (21)
Stuff the piece firmly, leave a long tail for sewing to the head.
free panda crochet pattern pdf
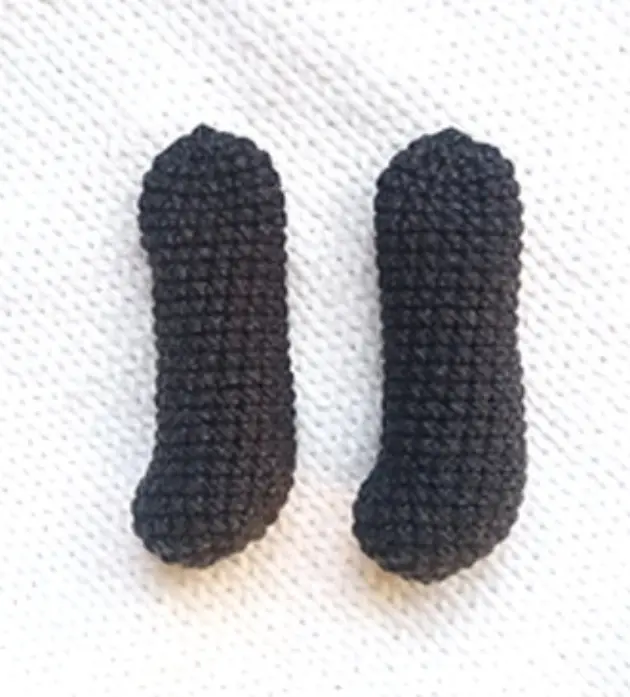
Legs (make 2)
(Stuff the piece as you go. 2/3 of leg should be stuffed firmly, and the last
part of leg need to be stuffed slightly. Crochet in black color.)
1 round 6 sc in mr
2 round 6 inc (12)
3 round (1 sc inc) х 6 times (18)
4 round (2 sc inc) х 6 times (24)
5,6 round (24)
7 round 4 sc, (dec 1 sc) х3 times, 11 sc (21)
8 round 3 sc, 3 dec, 12 sc (18)
9 -24 rounds (18) 16 rounds
25 round (1 sc dec) х 6 times (12)
26 round 6 dec
Fasten off the thread, leaving a tail with 15 cm in length. Bring the thread through
front loops of last 6 stitches of the last round using a needle, pull the opening closed
carefully, and weave in thread end inside of the piece.
Arms (make 2)
(Stuff the piece as you go. 2/3 of the arm should be stuffed firmly, and
the last part of arm needs to be stuffed slightly. Crochet in black color.)
1 round 4 sc in mr
2 round 4 inc (8)
3 round 8 inc (16)
4-11 rounds (16) 8 rounds
12 round 5 sc 6 hdc 5 sc (16)
13-21 rounds (16) 9 rounds
22 round (1 sc dec) х 4 times, 4 sc (12)
23 round 6 dec
Fasten off the thread, leaving a tail with 15 cm in
length. Bring the thread through front loops of last 6
stitches of the last round using a needle, pull the
opening closed carefully, and weave in thread end
inside of the piece.
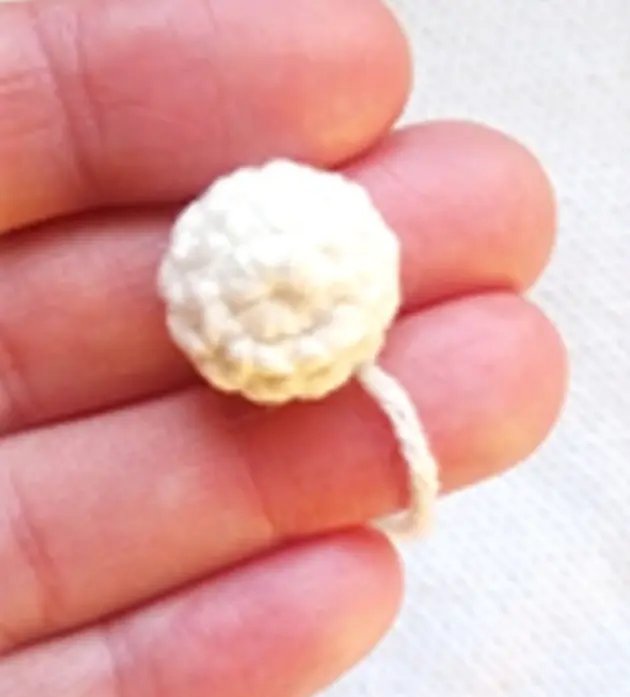
Muzzle
(in cream color)
1 round 6 sc in mr
2 round 6 inc (12)
3 round (1 sc inc) х 6 times (18)
4 round (18)
Leave a long tail for sewing
Free crochet Panda Bear pattern Ravelry download
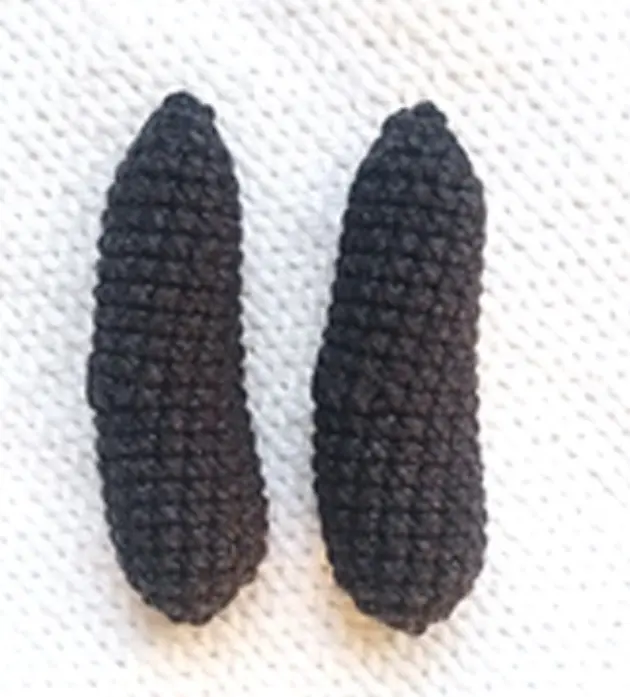
Ears (make 2)
(in black color)
1 round 6 sc in mr
2 round 6 inc (12)
3 round (1 sc inc) х 6 times (18)
4 round (18)
5 round (1 sc, dec) x 6 times (12)
6 round fold the piece in half and work
6 sc through two layers.
Leave a long tail for sewing.

Tail
(in cream color)
1 round 6 sc in mr
2 round 6 inc (12)
3,4 rounds (12)
Leave a long tail for sewing.
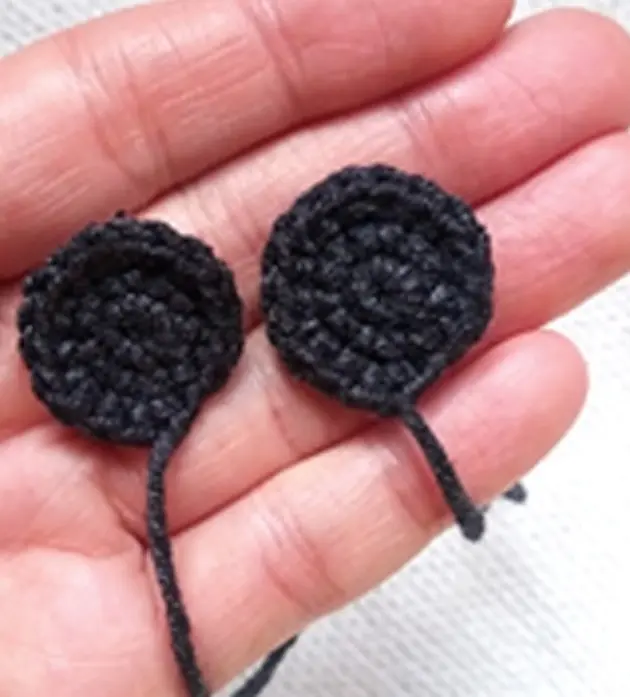
Discs (make 2)
(in black color)
1 round 6 sc in mr
2 round 6 inc (12)
3 round (1 sc inc) х 6 times (18)
Leave a long tail for sewing.
Head details
Sew the discs under the round 14. Leave
3 sts apart.
Sew the muzzle under the round 17. It
should be located at the center between
the discs. Add some stuffing while sewing
it to the head.
Embroider the nose with the thread
of black color. Divide it into 4 thin
strands. Embroider the nose above
the 3 round of the muzzle. I
make 6-7 horizontal stitches and
one vertical stitch.
Sew the eyes at the level of
horizontal stitches of the nose
Embroider the eye whites with the thread of cream color
(see photos 1-4
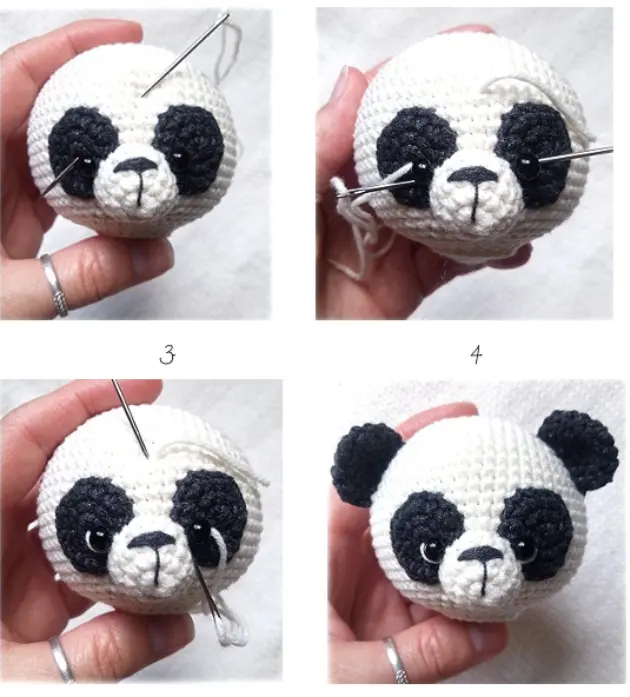
Bring the needle out of the same point where it was inserted at the first time. Tie a knot,
fasten off the threads, weave in end inside of the head using a crochet hook
Toy assembly
Sew the head to the body, having
fixed it with pins.
Add stuffing to the space between the
body and the head while sewing. So the
head would be fixed much better
Thread jointing of arms
For thread jointing we will need a strong cotton thread, a long needle and
a crochet hook
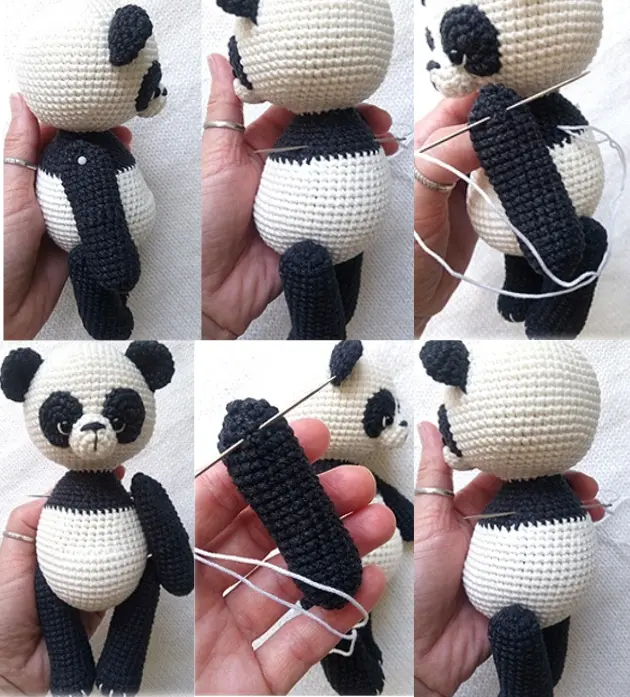
- Mark the points for arms
attaching. I attach the arms leaving
6 rounds from the head. 6 hdc form
the elbows.
18 - Insert the needle into the toy
back, bring out at the toy side
where the first arm will be
attached
3. Insert the needle under the third
round of the arm (count from the
top), bring it out leaving 2 sts from
the entry point
- Insert the needle into the same
point on the body, run through the
body out from another side where the
second arm will be attached.
.5. The second arm should be attached in
the same way as the first one, insert the
needle under the third round of the
arm, bring it out, leaving 2 sts, reinsert
the needle into the same point on the
body. Repeat all the steps with both
arms.
- Bring the needle out from the point,
where it was inserted at the first time.
Pull threads tightly so the arms were
pushed to the body. Tie a knot, fasten
off the thread ends and weave in
inside of the body using a crochet
hook
Thread jointings of legs
I attach the legs at the level of 8-9 rounds. Insert
the needle under the 4th round of the leg (counting
from the top).
Embroider the claws with the thread
of cream color.
Embroider the navel with the thread
of black color in the middle of the belly.